In the previous episodes, we applied the coordinator pattern to a typical Model-View-Controller application. A coordinator handles navigation and, as a result, simplifies the implementation of the view controllers of the project. View controllers are no longer tightly coupled, which increases their reusability. That brings us to the focus of this episode. What are the benefits and possibilities of reusable, loosely coupled view controllers?
Photos
I've created another sample application to demonstrate the benefits and possibilities of reusable, loosely coupled view controllers. The application is fairly simple and it already takes advantage of the coordinator pattern. Let me show you what the project looks like and what I'd like to accomplish in this episode.
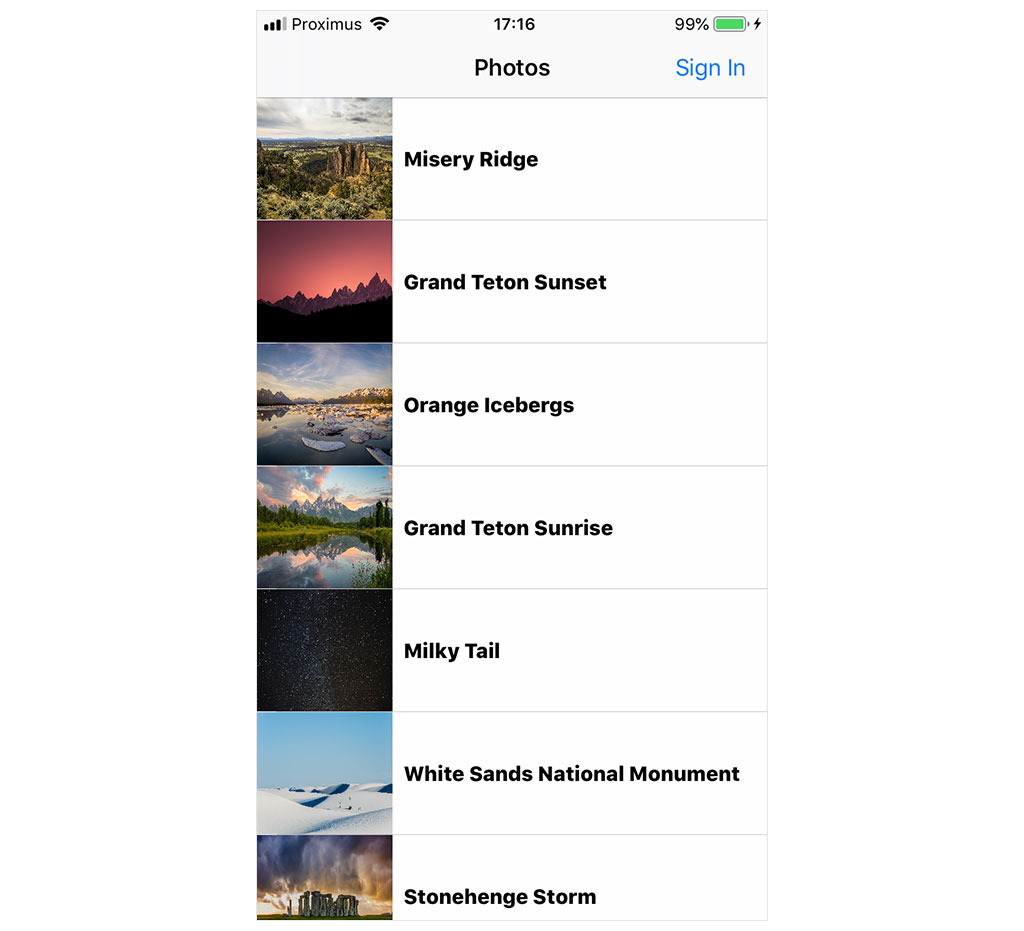
The application shows a collection of photos in a table view. Tapping a photo takes the user to a detail view.

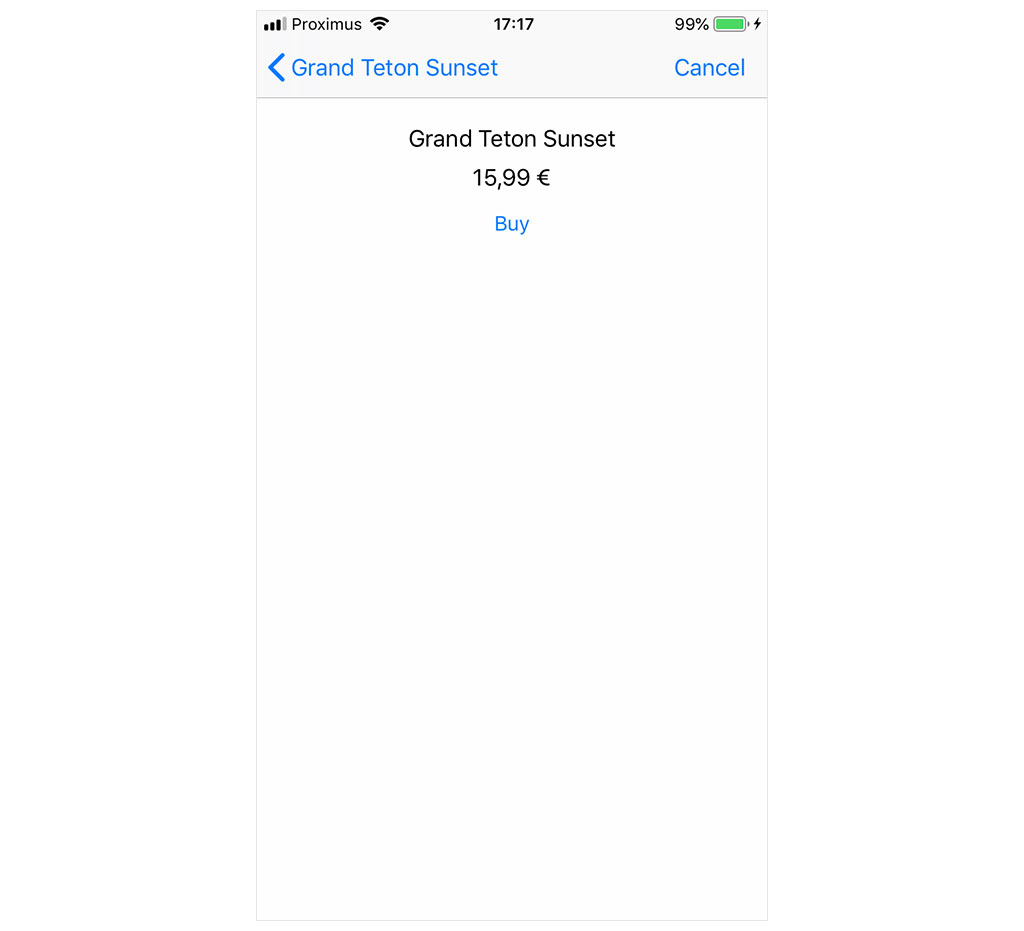
The application offers the option to buy photos. Tapping the Buy button in the top right brings the user to the buy view controller. The user can buy the selected photo by tapping the Buy button of the buy view controller.
But there's a problem. The user shouldn't be allowed to buy a photo if they aren't signed in. The application needs to know who is buying the photo. The user can authenticate herself by tapping the Sign In button in the top right of the photos view controller. The Sign In button doesn't do anything at the moment. Let's fix that.
Adding the Ability to Sign In
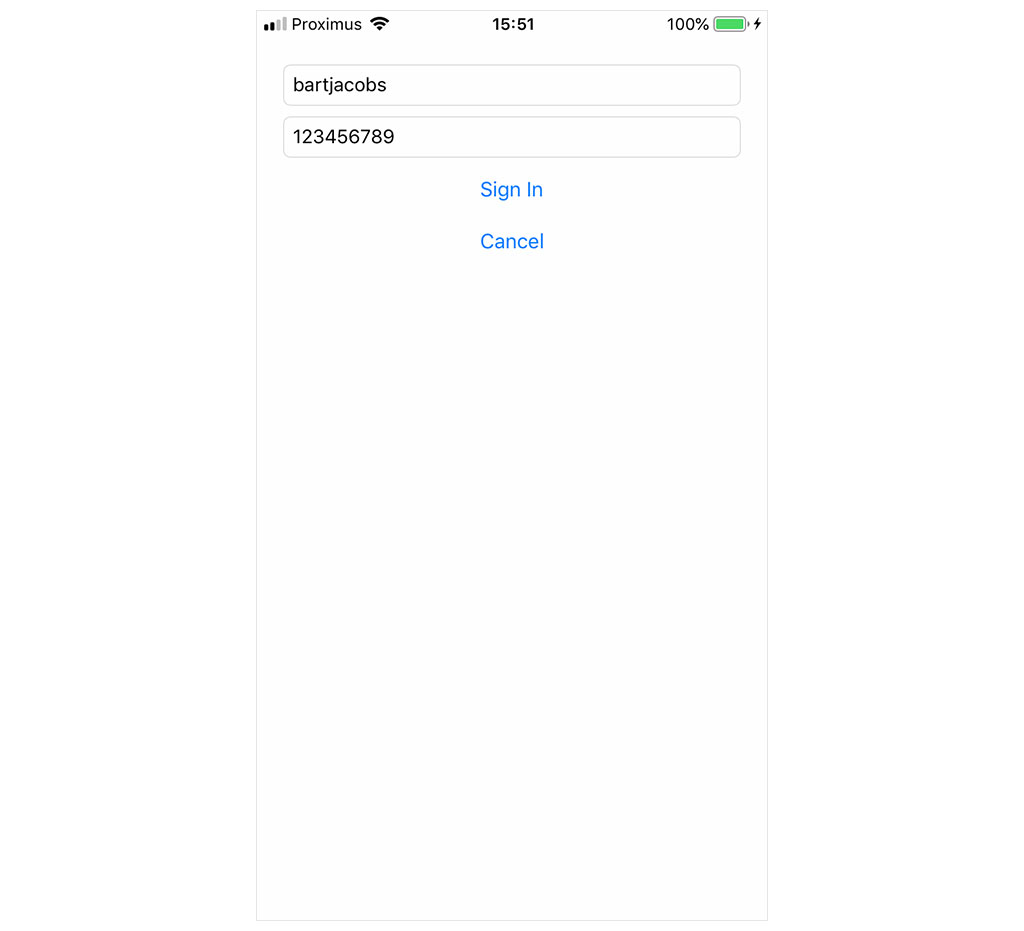
I've already created a view controller that enables the user to sign in. Open SignInViewController.swift. The SignInViewController class defines a text field for a username and a text field for a password. The text fields are populated with test values to facilitate development.
import UIKit

class SignInViewController: UIViewController, Storyboardable {

    // MARK: - Properties

    @IBOutlet var usernameTextField: UITextField! {
        didSet {
            // Configure Username Text Field
            usernameTextField.placeholder = "Username"

            #if DEBUG
            usernameTextField.text = "bartjacobs"
            #endif
        }
    }

    @IBOutlet var passwordTextField: UITextField! {
        didSet {
            // Configure Password Text Field
            passwordTextField.placeholder = "Password"

            #if DEBUG
            passwordTextField.text = "123456789"
            #endif
        }
    }

    ...

}
The signIn(_:) method of the SignInViewController class is invoked when the user taps the Sign In button below the text fields. The application doesn't perform a network request. I use the sleep(_:) function to simulate the delay of a network request.
@IBAction func signIn(_ sender: Any) {
    // Show Activity Indicator View
    activityIndicatorView.startAnimating()

    // Hide Sign In Button
    signInButton.isHidden = true

    // Disable Cancel Button
    cancelButton.isEnabled = false

    DispatchQueue.global().async {
        sleep(2)

        DispatchQueue.main.async {
            // Hide Activity Indicator View
            self.activityIndicatorView.stopAnimating()

            // Enable Cancel Button
            self.cancelButton.isEnabled = true

            // Invoke Handler
            self.didSignIn?("987654321")
        }
    }
}
It's important that you understand what happens when the user signs in. The SignInViewController class invokes its didSignIn handler when the user successfully signed in. The didSignIn handler accepts a string as its only argument, a token. The token identifies the user and is used by the application to communicate with a virtual backend.
I want to underline that storing sensitive information, such as the token in this example, shouldn't be stored in the user defaults database. Sensitive information should be stored in a secure location, such as the keychain. This application stores the token in the user defaults database to simplify the project.
Let's add the ability to sign in. Open AppCoordinator.swift and navigate to the showPhotos() method. The first step is simple. We present the sign in view controller when the user taps the Sign In button of the photos view controller. The PhotosViewController class invokes its didSignIn handler when the user taps the Sign In button. Let's use that handler to present the sign in view controller.
We assign a closure to the didSignIn property of the PhotosViewController instance in the showPhotos() method. In the body of the closure, we invoke a helper method, showSignIn(). The helper method accepts no arguments.
private func showPhotos() {
    // Initialize Photos View Controller
    let photosViewController = PhotosViewController.instantiate()

    // Install Handlers
    photosViewController.didSignIn = { [weak self] in
        self?.showSignIn()
    }

    photosViewController.didSelectPhoto = { [weak self] (photo) in
        self?.showPhoto(photo)
    }

    // Push Photos View Controller Onto Navigation Stack
    navigationController.pushViewController(photosViewController, animated: true)
}
The implementation of the showSignIn() method doesn't contain any surprises if you've watched the previous episodes. We initialize an instance of the SignInViewController class by invoking the instantiate() method. The SignInViewController class defines two handlers, the didSignIn handler and the didCancel handler.
We assign a closure to the didSignIn property of the SignInViewController instance. In the body of the closure, we store the token that is passed to the closure in the user defaults database and dismiss the sign in view controller by invoking the dismiss(animated:) method on the navigation controller of the coordinator. In the body of the closure we assign to the didCancel property of the SignInViewController instance, we dismiss the sign in view controller.
To show the sign in view controller to the user, we invoke the present(_:animated:completion:) method on the navigation controller of the coordinator.
private func showSignIn() {
    // Initialize Sign In View Controller
    let signInViewController = SignInViewController.instantiate()

    // Install Handlers
    signInViewController.didSignIn = { [weak self] (token) in
        // Update User Defaults
        UserDefaults.token = token

        // Dismiss View Controller
        self?.navigationController.dismiss(animated: true)
    }

    signInViewController.didCancel = { [weak self] in
        self?.navigationController.dismiss(animated: true)
    }

    // Present Sign In View Controller
    navigationController.present(signInViewController, animated: true)
}
Build and run the application to give it a try. Tap the Sign In button to navigate to the sign in view controller. Tap the Sign In button below the text fields to sign in. The sign in view controller is automatically dismissed when the user successfully signed in.
Notice that the Sign In button of the photos view controller is replaced by a Sign Out button. Tapping the Sign Out button signs the user out.

Creating a Dynamic Flow
The user is able to sign in and sign out. That's a good start. But remember that this episode focuses on the benefits and possibilities of reusable, loosely coupled view controllers. I have the following in mind. When the user taps the Buy button in the photo view controller, the application should verify whether the user is signed in. If the user isn't signed in, the sign in view controller is shown. After successfully signing in, the user resumes the purchase flow to the buy view controller. This is an important improvement because we don't want to interrupt the purchase flow. Every obstacle we put in front of the user in the purchase flow increases the chance that the user doesn't complete its purchase.
The project adopts the coordinator pattern, which means the coordinator decides which view controller is presented next. Open AppCoordinator.swift and navigate to the showPhoto(_:) method. In the closure assigned to the didBuyPhoto handler of the PhotoViewController instance, we check whether the user is signed in. The isSignedIn class property of the UserDefaults class is a convenience property that checks whether a token is currently being stored in the user defaults database. If the user is signed in, we invoke the buyPhoto(_:) method. If the user isn't signed in, we invoke the showSignIn() method.
private func showPhoto(_ photo: Photo) {
    // Initialize Photo View Controller
    let photoViewController = PhotoViewController.instantiate()

    // Configure Photo View Controller
    photoViewController.photo = photo

    // Install Handlers
    photoViewController.didBuyPhoto = { [weak self] (photo) in
        if UserDefaults.isSignedIn {
            self?.buyPhoto(photo)
        } else {
            self?.showSignIn()
        }
    }

    // Push Photo View Controller Onto Navigation Stack
    navigationController.pushViewController(photoViewController, animated: true)
}
We're not finished. What happens after the user successfully signed in? The purchase flow should resume. The buy view controller should be presented to the user. To make that possible, we need to temporarily store the photo the user is intending to buy. Define a private, variable property in AppCoordinator.swift and name it isBuyingPhoto. The property is of type Photo?.
import UIKit
import Foundation

class AppCoordinator {

    // MARK: - Properties

    private let navigationController = UINavigationController()

    // MARK: -

    private var isBuyingPhoto: Photo?

    // MARK: - Public API

    var rootViewController: UIViewController {
        return navigationController
    }

    ...

}
Revisit the showPhoto(_:) method. In the closure assigned to the didBuyPhoto property, we assign the Photo instance that is passed to the closure to the isBuyingPhoto property.
private func showPhoto(_ photo: Photo) {
    // Initialize Photo View Controller
    let photoViewController = PhotoViewController.instantiate()

    // Configure Photo View Controller
    photoViewController.photo = photo

    // Install Handlers
    photoViewController.didBuyPhoto = { [weak self] (photo) in
        // Update Helper
        self?.isBuyingPhoto = photo

        if UserDefaults.isSignedIn {
            self?.buyPhoto(photo)
        } else {
            self?.showSignIn()
        }
    }

    // Push Photo View Controller Onto Navigation Stack
    navigationController.pushViewController(photoViewController, animated: true)
}
To continue the purchase flow, we also need to update the showSignIn() method. In the closure assigned to the didSignIn property, we safely unwrap the value of the isBuyingPhoto property. We know that the user is in the middle of buying a photo if the isBuyingPhoto property isn't equal to nil. In that scenario, we resume the purchase flow by invoking the buyPhoto(_:) method. We dismiss the sign in view controller if the isBuyingPhoto property is equal to nil.
private func showSignIn() {
    // Initialize Sign In View Controller
    let signInViewController = SignInViewController.instantiate()

    // Install Handlers
    signInViewController.didSignIn = { [weak self] (token) in
        // Update User Defaults
        UserDefaults.token = token

        if let photo = self?.isBuyingPhoto {
            // Buy Photo
            self?.buyPhoto(photo)
        } else {
            // Dismiss View Controller
            self?.navigationController.dismiss(animated: true)
        }
    }

    signInViewController.didCancel = { [weak self] in
        self?.navigationController.dismiss(animated: true)
    }

    // Present Sign In View Controller
    navigationController.present(signInViewController, animated: true)
}
Before we run the application, we need to reset the isBuyingPhoto property if the user cancels the purchase flow or if the user successfully purchased a photo. Revisit the buyPhoto(_:) method. Set the isBuyingPhoto property to nil in the didCancel handler and in the didBuyPhoto handler.
private func buyPhoto(_ photo: Photo) {
    // Initialize Buy View Controller
    let buyViewController = BuyViewController.instantiate()

    // Configure Buy View Controller
    buyViewController.photo = photo

    // Install Handlers
    buyViewController.didCancel = { [weak self] in
        // Reset Helper
        self?.isBuyingPhoto = nil

        // Pop View Controller From Navigation Stack
        self?.navigationController.popViewController(animated: true)
    }

    buyViewController.didBuyPhoto = { [weak self] _ in
        // Reset Helper
        self?.isBuyingPhoto = nil

        // Update User Defaults
        UserDefaults.buy(photo: photo)

        // Pop View Controller From Navigation Stack
        self?.navigationController.popViewController(animated: true)
    }

    // Push Buy View Controller Onto Navigation Stack
    navigationController.pushViewController(buyViewController, animated: true)
}
Build and run the application to see the result. Tap a photo in the photos view controller and tap the Buy button in the top right. Notice that the sign in view controller is presented modally. That isn't right. It should be pushed onto the navigation stack of the navigation controller of the coordinator. It shouldn't interrupt the purchase flow. We need to make a few tweaks to resolve this issue.
View Controller Transitions
The changes we need to make are small. We need to define what type of view controller transition to perform when showing the sign in view controller to the user. Open AppCoordinator.swift and define a private enum with name PresentationStyle. The enum defines two cases, present and push.
import UIKit
import Foundation

class AppCoordinator {

    // MARK: - Types

    private enum PresentationStyle {
        case present
        case push
    }

    ...

}
The PresentationStyle enum defines how the sign in view controller is presented to the user. Navigate to the showSignIn() method. We update the showSignIn() method by passing the presentation style as an argument.
private func showSignIn(style: PresentationStyle) {
    ...
}
We use the style parameter to determine how the sign in view controller is presented to the user. If the value of the style parameter is equal to present, then we invoke the present(_:animated:completion:) method on the navigation controller. If the value of the style parameter is equal to push, then we invoke the push(_:animated:) method on the navigation controller.
private func showSignIn(style: PresentationStyle) {
    ...

    switch style {
    case .present:
        navigationController.present(signInViewController, animated: true)
    case .push:
        navigationController.pushViewController(signInViewController, animated: true)
    }
}
The showSignIn(style:) method is invoked in the showPhotos() method and in the showPhoto(_:) method. Let's update these methods. If the user taps the Sign In button in the top right of the photos view controller, then the sign in view controller needs to be presented modally. We pass present as an argument to the showSignIn(style:) method.
private func showPhotos() {
    // Initialize Photos View Controller
    let photosViewController = PhotosViewController.instantiate()

    // Install Handlers
    photosViewController.didSignIn = { [weak self] in
        self?.showSignIn(style: .present)
    }

    photosViewController.didSelectPhoto = { [weak self] (photo) in
        self?.showPhoto(photo)
    }

    // Push Photos View Controller Onto Navigation Stack
    navigationController.pushViewController(photosViewController, animated: true)
}
This isn't true for the showPhoto(_:) method. The sign in view controller should be inserted into the purchase flow. We pass push as an argument to the showSignIn(style:) method to push the sign in view controller onto the navigation stack of the coordinator's navigation controller.
private func showPhoto(_ photo: Photo) {
    // Initialize Photo View Controller
    let photoViewController = PhotoViewController.instantiate()

    // Configure Photo View Controller
    photoViewController.photo = photo

    // Install Handlers
    photoViewController.didBuyPhoto = { [weak self] (photo) in
        // Update Helper
        self?.isBuyingPhoto = photo

        if UserDefaults.isSignedIn {
            self?.buyPhoto(photo)
        } else {
            self?.showSignIn(style: .push)
        }
    }

    // Push Photo View Controller Onto Navigation Stack
    navigationController.pushViewController(photoViewController, animated: true)
}
Popping View Controllers
We need to make a small change to the buyPhoto(_:) method before we run the application. The buy view controller is popped from the navigation stack if the user cancels the purchase flow or if the user successfully purchased a photo. But there's a problem. If the user needs to sign in during the purchase flow, then the sign in view controller is part of the navigation stack. Popping the buy view controller from the navigation stack takes the user back to the sign in view controller. That isn't necessary and it will only confuse the user.
The solution is simple. Instead of popping the buy view controller from the navigation stack, we navigate back to the photo view controller. We use a little trick to accomplish that. The viewControllers property of a navigation controller contains the view controllers currently on the navigation stack. We need to search the array of view controllers and find the photo view controller. We then invoke the popToViewController(_:animated:) method on the navigation controller, passing in the photo view controller.
If the coordinator isn't able to find a PhotoViewController instance in the array of view controllers, then we fail silently and elegantly by popping to the root view controller of the navigation controller. This should never happen, though.
private func buyPhoto(_ photo: Photo) {
    // Initialize Buy View Controller
    let buyViewController = BuyViewController.instantiate()

    // Configure Buy View Controller
    buyViewController.photo = photo

    // Install Handlers
    buyViewController.didCancel = { [weak self] in
        // Reset Helper
        self?.isBuyingPhoto = nil

        if let viewController = self?.navigationController.viewControllers.first(where: { $0 is PhotoViewController }) {
            self?.navigationController.popToViewController(viewController, animated: true)
        } else {
            self?.navigationController.popToRootViewController(animated: true)
        }
    }

    buyViewController.didBuyPhoto = { [weak self] _ in
        // Reset Helper
        self?.isBuyingPhoto = nil

        // Update User Defaults
        UserDefaults.buy(photo: photo)

        if let viewController = self?.navigationController.viewControllers.first(where: { $0 is PhotoViewController }) {
            self?.navigationController.popToViewController(viewController, animated: true)
        } else {
            self?.navigationController.popToRootViewController(animated: true)
        }
    }

    // Push Buy View Controller Onto Navigation Stack
    navigationController.pushViewController(buyViewController, animated: true)
}
That's it. Build and run the application. Make sure you're not signed in. Select a photo from the table view and tap the Buy button in the top right. You're presented with the sign in view controller. Tap the Sign In button to sign in. After successfully signing in, the coordinator resumes the purchase flow by presenting the buy view controller. Tap the Buy button to purchase the photo. After successfully completing the purchase, the user is taken back to the photo view controller and the label PURCHASED is shown in the bottom right.
What's Next?
The more we learn about the coordinator pattern, the more we discover how useful the pattern is to create flexible and scalable applications. We successfully reused the sign in view controller by integrating it into the purchase flow.
But there's room for improvement. The coordinator manages state. Remember that we defined a property, isBuyingPhoto, of type Photo?. The coordinator uses the property to know whether the user is currently in the middle of buying a photo. Managing state is necessary in this scenario, but we can make a significant improvement. In the next episode, we clean up the implementation by introducing a child coordinator.