It is time to refactor the AddLocationViewController class. We start by removing any references to the Core Location framework, the import statement at the top, the geocoder property, the geocode(addressString:) method, and the processResponse(withPlacemarks:error:) method.
We can also remove the locations property. The add location view controller no longer stores the results of the geocoding request. That is the responsibility of its view model.
We need to declare two properties. The first property is an outlet for a UIActivityIndicatorView. We add the activity indicator view to the storyboard in a moment.
AddLocationViewController.swift
@IBOutlet var activityIndicatorView: UIActivityIndicatorView!
The second property is for the view model. The property is named viewModel and is of type AddLocationViewModel!. Notice that the property is an implicitly unwrapped optional.
AddLocationViewController.swift
private var viewModel: AddLocationViewModel!
We create the view model in the viewDidLoad() method of the AddLocationViewController class. We could create the view model in the prepare(for:sender:) method of the LocationsViewController class and inject it into the AddLocationViewController instance. That is the option I prefer. This is especially useful if the view model has dependencies of its own.
Later in the series, however, it is important that we create the view model in the add location view controller. Don't worry about this for now.
AddLocationViewController.swift
override func viewDidLoad() {
    super.viewDidLoad()

    // Set Title
    title = "Add Location"

    // Initialize View Model
    viewModel = AddLocationViewModel()
}
In the viewDidLoad() method of the AddLocationViewController class, we assign values to the locationsDidChange and queryingDidChange properties.
AddLocationViewController.swift
override func viewDidLoad() {
    super.viewDidLoad()

    // Set Title
    title = "Add Location"

    // Initialize View Model
    viewModel = AddLocationViewModel()

    // Configure View Model
    viewModel.locationsDidChange = { [weak self] (locations) in
        self?.tableView.reloadData()
    }

    viewModel.queryingDidChange = { [weak self] (querying) in
        if querying {
            self?.activityIndicatorView.startAnimating()
        } else {
            self?.activityIndicatorView.stopAnimating()
        }
    }
}
Let me explain how this works. Every time the value of the locations property of the view model changes, the locationsDidChange closure is executed. In response, the view controller updates the table view by calling reloadData() on the table view.
The same applies to the queryingDidChange property. If the value of querying is true, we call startAnimating() on the activity indicator view. If the value of querying is false, we call stopAnimating() on the activity indicator view.
Updating the User Interface
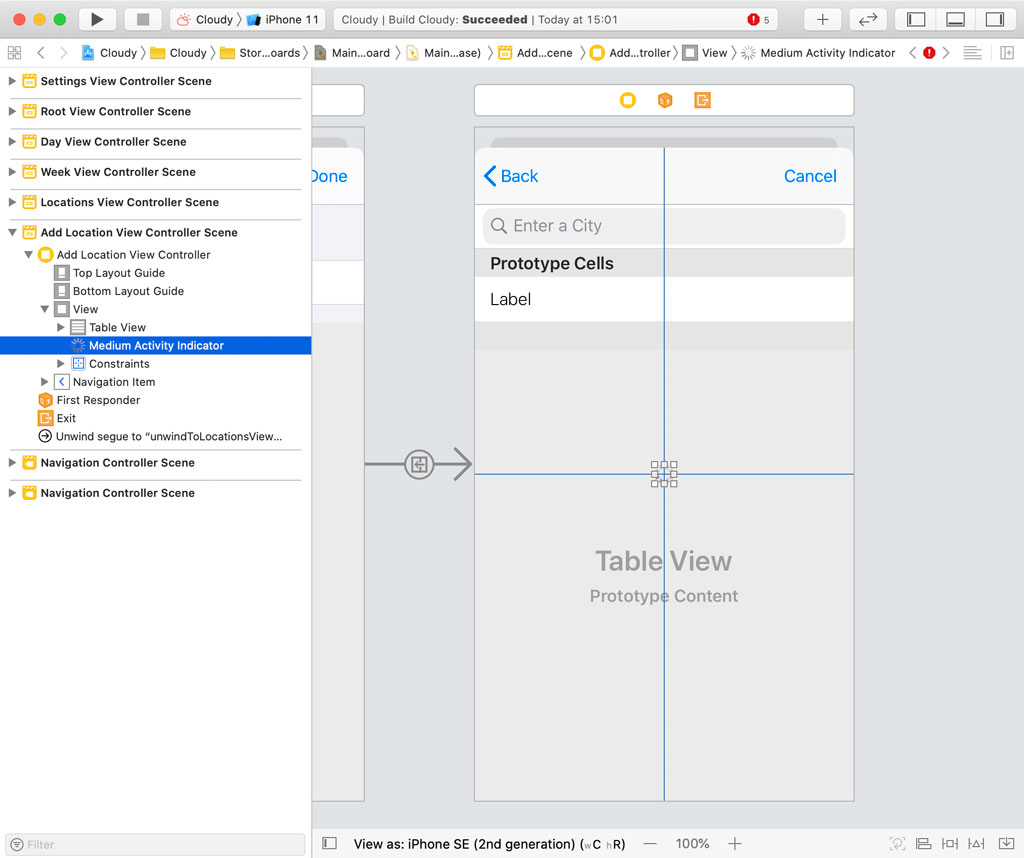
Remember that we need to add an activity indicator view to the main storyboard. Open Main.storyboard and locate the Add Location View Controller Scene. Add an activity indicator view from the Object Library and center it in its superview using Auto Layout. Connect the activity indicator view to the outlet we created a moment ago.
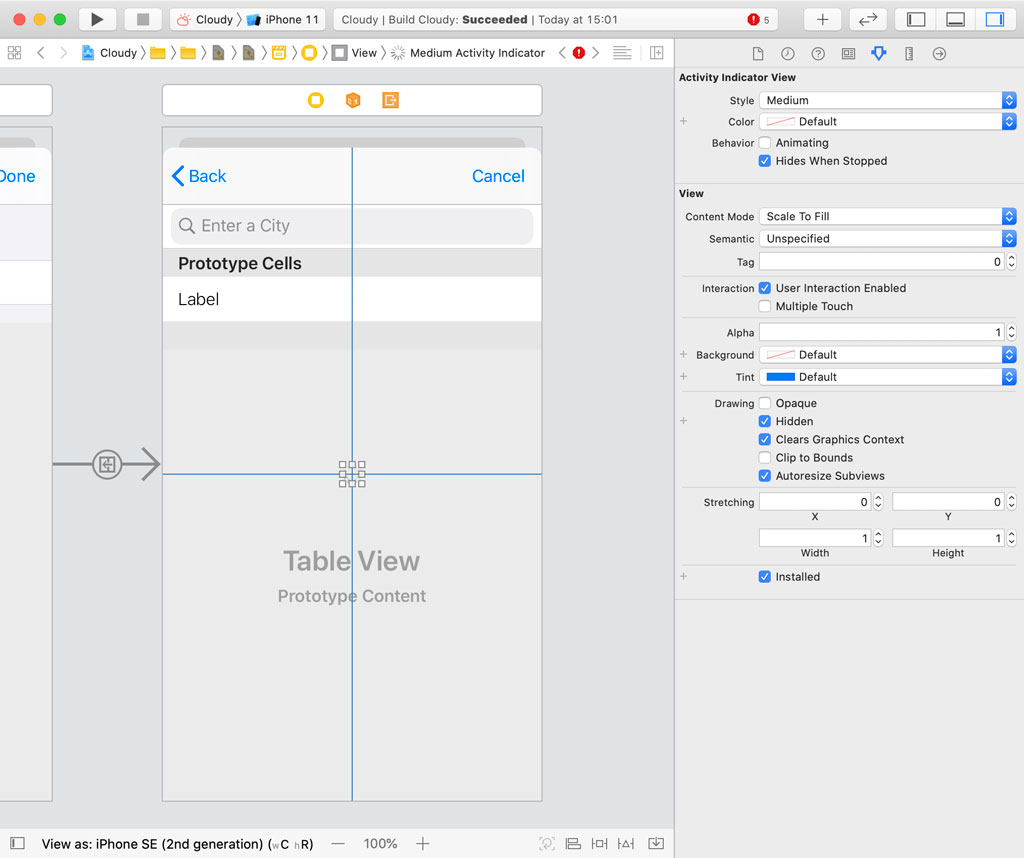
With the activity indicator view selected, open the Attributes Inspector on the right and check Hides When Stopped. The Hidden checkbox should automatically be checked as a result.
More Refactoring
Before we run the application, we need to update the implementations of the UITableViewDataSource, UITableViewDelegate, and UISearchBarDelegate protocols.
UITableViewDataSource Protocol
Updating the UITableViewDataSource protocol is very easy thanks to the view model. We can even delete a few lines of code in the tableView(_:cellForRowAt:) method.
AddLocationViewController.swift
extension AddLocationViewController: UITableViewDataSource {

    func tableView(_ tableView: UITableView, numberOfRowsInSection section: Int) -> Int {
        viewModel.numberOfLocations
    }

    func tableView(_ tableView: UITableView, cellForRowAt indexPath: IndexPath) -> UITableViewCell {
        guard let cell = tableView.dequeueReusableCell(withIdentifier: LocationTableViewCell.reuseIdentifier, for: indexPath) as? LocationTableViewCell else {
            fatalError("Unable to Dequeue Location Table View Cell")
        }

        if let viewModel = viewModel.viewModelForLocation(at: indexPath.row) {
            // Configure Table View Cell
            cell.configure(withViewModel: viewModel)
        }

        return cell
    }

}
UITableViewDelegate Protocol
In the tableView(_:didSelectRowAt:) method, we need to rewrite one line. We ask the view model for the Location object that corresponds with the row the user tapped.
AddLocationViewController.swift
extension AddLocationViewController: UITableViewDelegate {

    func tableView(_ tableView: UITableView, didSelectRowAt indexPath: IndexPath) {
        guard let location = viewModel?.location(at: indexPath.row) else {
            return
        }

        // Notify Delegate
        delegate?.controller(self, didAddLocation: location)

        // Pop View Controller From Navigation Stack
        navigationController?.popViewController(animated: true)
    }

}
Notice that the heavy lifting is done by the view controller's view model. The view controller is only tasked with populating its view and responding to user interaction.
UISearchBarDelegate Protocol
In searchBarSearchButtonClicked(_:) and searchBarCancelButtonClicked(_:), we set the query property of the view model. That in turn triggers a geocoding request in the view model.
AddLocationViewController.swift
extension AddLocationViewController: UISearchBarDelegate {

    func searchBarSearchButtonClicked(_ searchBar: UISearchBar) {
        // Hide Keyboard
        searchBar.resignFirstResponder()

        // Update Query
        viewModel.query = searchBar.text ?? ""
    }

    func searchBarCancelButtonClicked(_ searchBar: UISearchBar) {
        // Hide Keyboard
        searchBar.resignFirstResponder()

        // Reset Query
        viewModel.query = ""
    }

}
It is time to run the application to see if everything is still working. We should now also see an activity indicator view when a geocoding request is in progress.
This looks good. We are currently using a primitive bindings solution. This is fine to illustrate how the Model-View-ViewModel pattern plays together with bindings under the hood. It takes away the magic that you see when you start using a more advanced solution, such as RxSwift or Combine.
What's Next?
But since we are taking the Model-View-ViewModel pattern to the next level, we need to step up our game and look for a better bindings solution. In the next few episodes, we refactor the current implementation to use RxSWift and Combine.