The collection view of the feed view controller now displays episode images. We are almost ready to build the user interface of the collection view and style the EpisodeCollectionViewCell class. Before we start with that task, I want to create a framework for styling the application. That is the focus of this episode.
Creating a Consistent User Interface
You should know by now that I don't like random string literals floating around in a project. A related problem is the lack of a framework for styling the application. This usually results in an inconsistent user interface and user experience. I don't imply that you should use a third party framework for styling the application. The idea is to create a lightweight framework that makes it easy to style user interface elements and, as a result, promotes a consistent user interface and user experience. Let me show you what I have in mind.
Defining Colors
For most projects, I define a color scheme and consistently apply it in the project. The Cocoacasts website already defines a color scheme and the plan is to port it to the Xcode project.
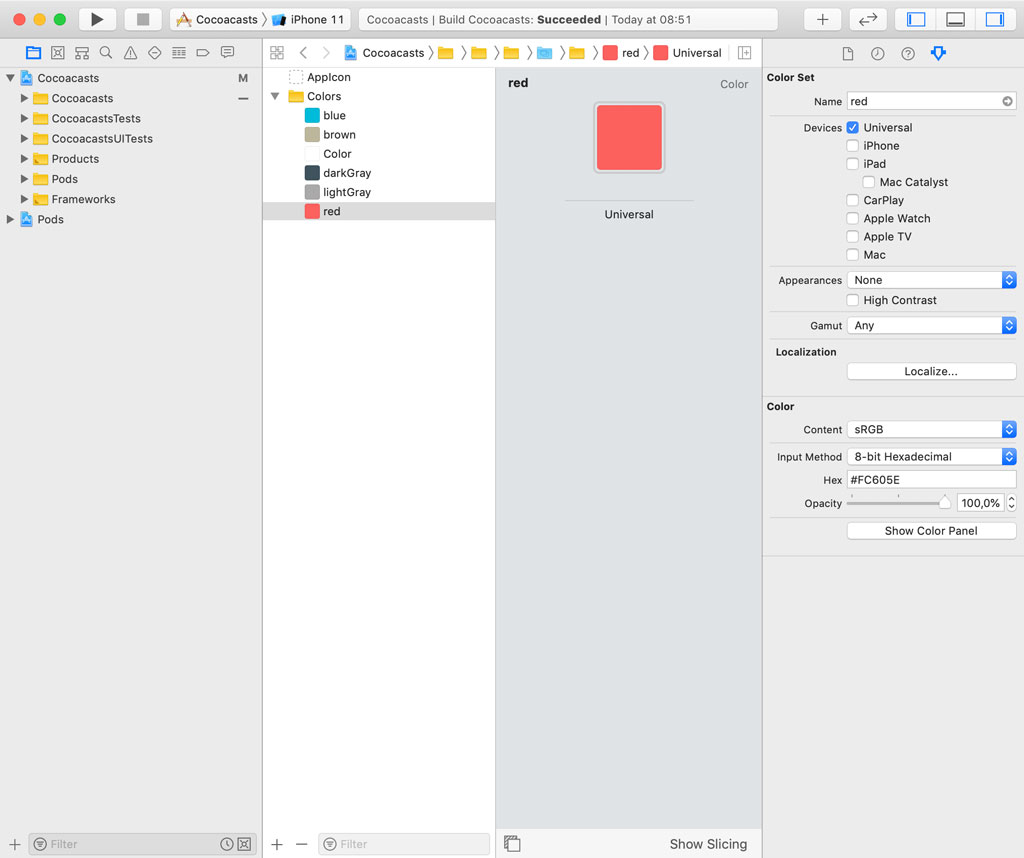
A few years ago, Apple introduced color assets and we use that feature in this episode. Color assets offer the ability to define and name colors. Open Assets.xcassets and add a folder with name Colors by clicking the + button at the bottom and choosing New Folder from the menu. The Cocoacasts website defines red, blue, brown, and two tints of gray, a light gray and a dark gray. With the Colors folder selected, click the + button and choose New Color Set. Name the color set red.
Select the color in the editor and open the Attributes Inspector on the right. Set Input Method to 8-bit Hexadecimal and enter the hexadecimal value in the Hex field. We keep Content set to sRGB. We repeat these steps for the other colors of the Cocoacasts color scheme.
You can access a named color by invoking the init?(named:) initializer of the UIColor class. We take it one step further by creating a static, constant property for each named color.
Create a group with name Design in the Miscellaneous group and add a Swift file to the Design group. Name the Swift file UIColor+Design.swift. We replace the import statement for Foundation with an import statement for UIKit and define an extension for the UIColor class. To avoid name collisions, we create a namespace for the named colors by defining an enum with name Cocoacasts. The Cocoacasts enum defines a static, constant property for each of the named colors in the asset catalog. We invoke the init?(named:) initializer to create the UIColor instance and forced unwrap the result of the initialization. Initializing a named color should never fail.
import UIKit

extension UIColor {

    enum Cocoacasts {

        static let red = UIColor(named: "red")!
        static let blue = UIColor(named: "blue")!
        static let brown = UIColor(named: "brown")!
        static let darkGray = UIColor(named: "darkGray")!
        static let lightGray = UIColor(named: "lightGray")!

    }

}
As an alternative for the namespace, you can add a prefix to the static properties. In this example, I could name the static properties ccRed, ccBlue, ccBrown, and so on. Choose the option you prefer.
Defining Fonts
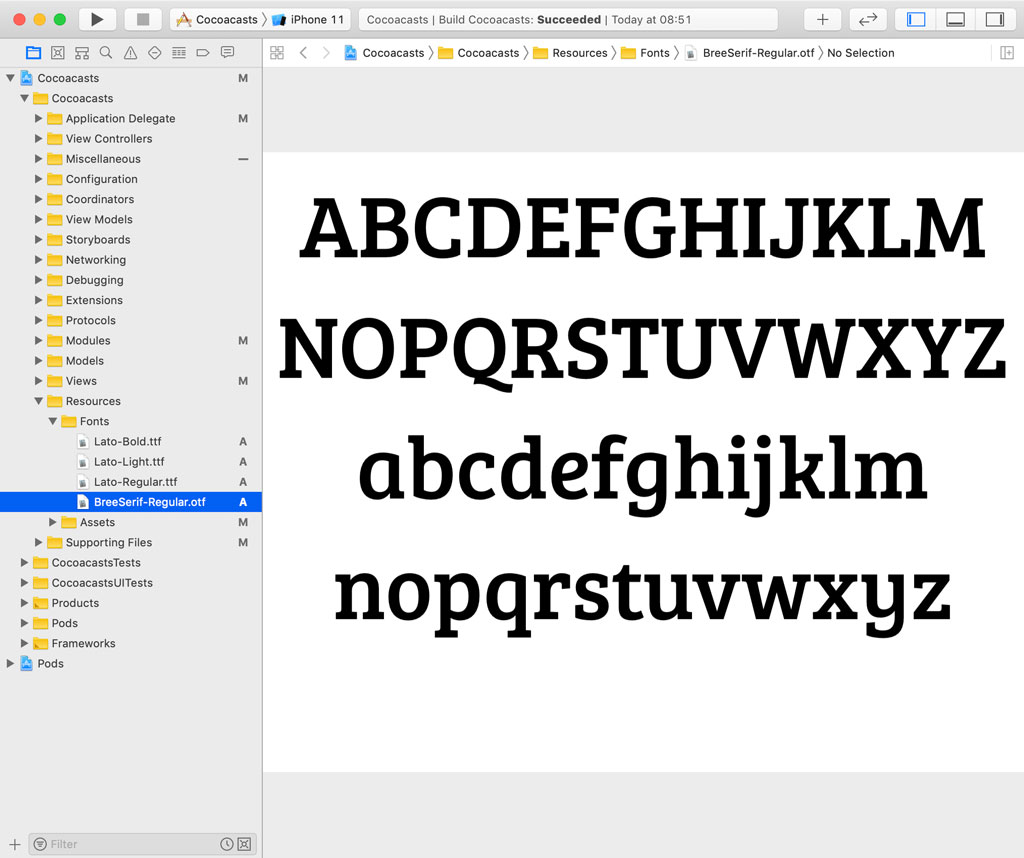
The Cocoacasts website uses a number of custom fonts and I would like to use these fonts in the iOS and tvOS clients. This isn't complicated. We create a group, Fonts, in the Resources group and add the custom fonts to the Fonts group.
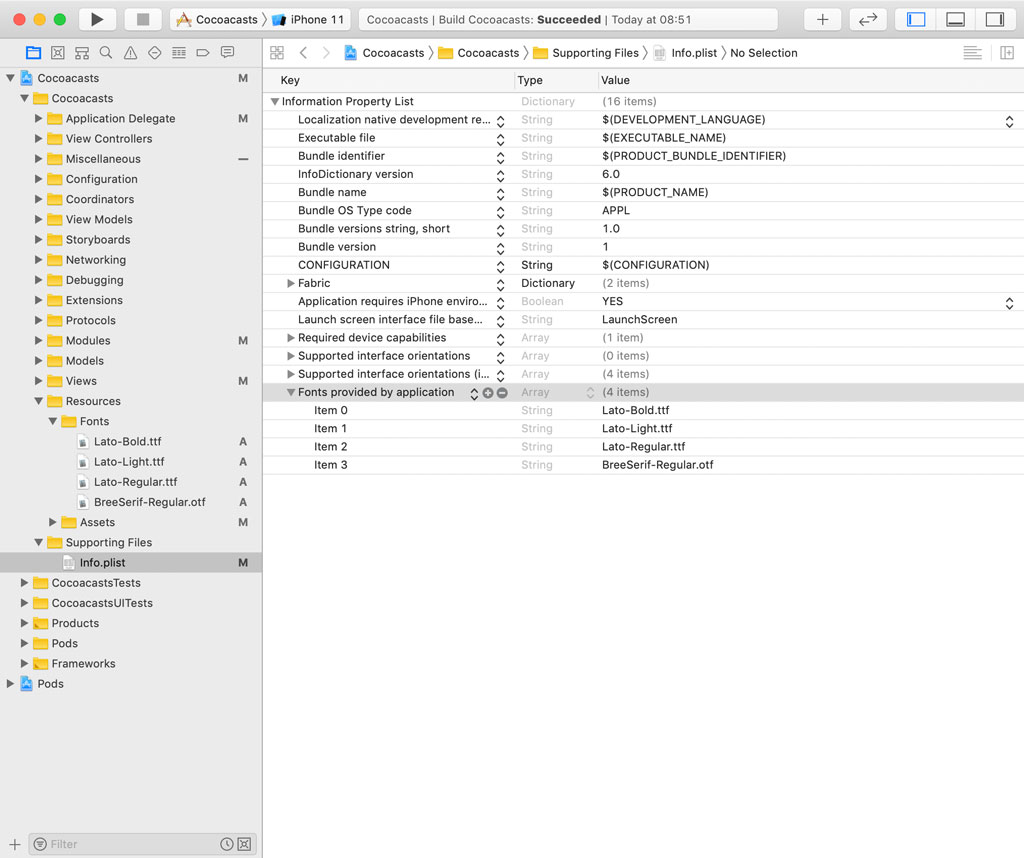
Adding the custom fonts to the application bundle doesn't suffice. We need to add the fonts to the application's Info.plist. Open the application's Info.plist and add a row with key Fonts provided by application. The value is an array of strings, the names of the font files we added to the Fonts group.
To use the fonts, we need to know the name of the font family and the names of the fonts. We obtain that information by asking the UIFont class for a list of the font families and the available fonts for each font family. This is easy to find out. Open AppDelegate.swift.
We can access the list of font family names through the familyNames class property of the UIFont class. We sort the list of font family names and invoke the forEach(_:) method to access each font family name.
func application(_ application: UIApplication, didFinishLaunchingWithOptions launchOptions: [UIApplication.LaunchOptionsKey: Any]?) -> Bool {
    ...

    UIFont.familyNames.sorted().forEach {

    }

    return true
}
In the closure we pass to the forEach(_:) method, we ask the UIFont class for the font names of the font family by invoking the fontNames(forFamilyName:) method, passing in the font family name. We sort the list of font names and invoke the forEach(_:) method to access each font name. Let's print the names of each font family and its fonts.
func application(_ application: UIApplication, didFinishLaunchingWithOptions launchOptions: [UIApplication.LaunchOptionsKey: Any]?) -> Bool {
    ...

    UIFont.familyNames.sorted().forEach {
        print($0)
        UIFont.fontNames(forFamilyName: $0).sorted().forEach { (fontName) in
            print("   ", fontName)
        }
    }

    return true
}
Build and run the application in the simulator and inspect the output in the console. The output shows us the names of the fonts for Bree Serif and Lato, the custom fonts we added to the Fonts group and defined in the application's Info.plist.
Bree Serif
    BreeSerif-Regular
Lato
    Lato-Bold
    Lato-Light
    Lato-Regular
Before we move on, we remove the code we added to the application(_:didFinishLaunchingWithOptions:) method in AppDelegate.swift.
Creating an Extension for UIFont
To use the custom fonts, we define a few helper methods in an extension for UIFont. Add a Swift file to the Design group and name it UIFont+Design.swift. We replace the import statement for Foundation with an import statement for UIKit and define an extension for UIFont.
import UIKit

extension UIFont {

}
Remember that we plan to create a framework that makes it easier to style the application. The idea is to create a number of predefined styles. We don't want to expose the font names to the rest of the project. We start by defining a private, static, constant property, breeSerif. We assign a string literal to the property, the name of the Bree Serif font. We repeat this step for Lato Bold, Lato Light, and Lato Regular.
import UIKit

extension UIFont {

    // MARK: - Fonts

    private static let breeSerif = "BreeSerif-Regular"

    private static let latoBold = "Lato-Bold"
    private static let latoLight = "Lato-Light"
    private static let latoRegular = "Lato-Regular"

}
To create a UIFont instance, we define a convenience method for each font name. The convenience method makes it easy to create a UIFont instance for a particular font. We define a static method, breeSerif(of:), that accepts one argument of type CGFloat, the size of the font. The method returns a UIFont instance.
The implementation of the method is straightforward. It uses the breeSerif constant property and the value of the size parameter to create a UIFont instance. Notice that the result of the initialization is forced unwrapped. Creating a UIFont instance should not fail. We repeat these steps for Lato Bold, Lato Light, and Lato Regular.
import UIKit

extension UIFont {

    // MARK: - Fonts

    private static let breeSerif = "BreeSerif-Regular"

    private static let latoBold = "Lato-Bold"
    private static let latoLight = "Lato-Light"
    private static let latoRegular = "Lato-Regular"

    // MARK: - Convenience Methods

    static func breeSerif(of size: CGFloat) -> UIFont {
        return UIFont(name: breeSerif, size: size)!
    }

    static func latoBold(of size: CGFloat) -> UIFont {
        return UIFont(name: latoBold, size: size)!
    }

    static func latoLight(of size: CGFloat) -> UIFont {
        return UIFont(name: latoLight, size: size)!
    }

    static func latoRegular(of size: CGFloat) -> UIFont {
        return UIFont(name: latoRegular, size: size)!
    }

}
Defining Styles
The idea I have in mind for the framework is similar to how a web page is styled using cascading style sheets or CSS. We define a number of styles and use these styles throughout the project. It summarizes which styles are available, it promotes consistency, and it improves maintainability. Add a Swift file to the Design group and name it Typography.swift.
We replace the import statement for Foundation with an import statement for UIKit and create an extension for String. The easiest solution to style a button or a label is by using attributed strings. For each style, we define a method that returns an attributed string. Let's start with a simple example. We name the method toTitle() and it returns an NSAttributedString instance.
import UIKit

extension String {

    func toTitle() -> NSAttributedString {

    }

}
We first define the attributes of the attributed string by defining a constant, attributes, of type [NSAttributedString.Key: Any]. We set the font to Bree Serif and the font size to 24.0 points. We use the dictionary of attributes to create the attributed string and return it from the method.
import UIKit

extension String {

    func toTitle() -> NSAttributedString {
        // Define Attributes
        let attributes: [NSAttributedString.Key: Any] = [
            .font: UIFont.breeSerif(of: 24.0)
        ]

        return NSAttributedString(string: self, attributes: attributes)
    }

}
This is as simple as it gets. We can make the toTitle() method more flexible by defining several optional parameters. The first optional parameter we define is color of type UIColor. Its default value is black. We add the color to the dictionary of attributes.
import UIKit

extension String {

    func toTitle(color: UIColor = .black) -> NSAttributedString {
        // Define Attributes
        let attributes: [NSAttributedString.Key: Any] = [
            .font: UIFont.breeSerif(of: 24.0),
            .foregroundColor: color
        ]

        return NSAttributedString(string: self, attributes: attributes)
    }

}
The second optional parameter we define is textAlignment of type NSTextAlignment. Its default value is center. Setting the text alignment of the attributed string is slightly more complex. We define an instance of the NSMutableParagraphStyle class, set its alignment property, and update the dictionary of attributes.
import UIKit

extension String {

    func toTitle(color: UIColor = .black, textAlignment: NSTextAlignment = .center) -> NSAttributedString {
        // Create Paragraph Style
        let paragraphStyle = NSMutableParagraphStyle()

        // Configure Paragraph Style
        paragraphStyle.alignment = textAlignment

        // Define Attributes
        let attributes: [NSAttributedString.Key: Any] = [
            .font: UIFont.breeSerif(of: 24.0),
            .paragraphStyle: paragraphStyle,
            .foregroundColor: color
        ]

        return NSAttributedString(string: self, attributes: attributes)
    }

}
This example shows how easy it is to define a style that can be used throughout the project.
Using the Builder Pattern
Let's take it one step further and use the builder pattern to create a beautiful API. In Typography.swift, we define a final class with name StringBuilder. The class defines a constant property, string, of type String. The value of string is the string we plan to style. We define an initializer that accepts one argument, string, of type String. We set the string property in the body of the initializer.
final class StringBuilder {

    // MARK: - Properties

    private let string: String

    // MARK: - Initialization

    init(string: String) {
        // Set Properties
        self.string = string
    }

}
You should be familiar with the builder pattern if you watched the previous episode. We define a nested enum with name FontName. It defines a case for each of the custom fonts, breeSerif, latoBold, latoLight, and latoRegular. We also implement a convenience method, font(of:) that returns a UIFont instance. The FontName object uses the convenience methods we defined earlier in the extension for the UIFont class to create a UIFont object. We limit access to the font(of:) method with the fileprivate keyword.
final class StringBuilder {

    // MARK: - Types

    enum FontName {

        // MARK: - Cases

        case breeSerif
        case latoBold
        case latoLight
        case latoRegular

        // MARK: - Methods

        fileprivate func font(of size: CGFloat) -> UIFont {
            switch self {
            case .breeSerif: return UIFont.breeSerif(of: size)
            case .latoBold: return UIFont.latoBold(of: size)
            case .latoLight: return UIFont.latoLight(of: size)
            case .latoRegular: return UIFont.latoRegular(of: size)
            }
        }

    }

    // MARK: - Properties

    private let string: String

    // MARK: - Initialization

    init(string: String) {
        // Set Properties
        self.string = string
    }

}
The next step is defining private, variable properties for the attributes we want to customize using the builder. We start with a private, variable property, fontName, of type FontName. The default value of the fontName property is latoRegular.
private var fontName: FontName = .latoRegular
We also define a private, variable property for the size of the UIFont instance. The size property is of type CGFloat and has a default value of 17.0 points.
private var size: CGFloat = 17.0
The next property we define is of type UIColor and defines the color of the attributed string. The default value of the color property is black.
private var color: UIColor = .black
The last property we define is textAlignment of type NSTextAlignment with a default value of center.
private var textAlignment: NSTextAlignment = .center
With the private properties in place, it's time to define the public API. We create a method for each of the properties, fontName(_:), size(_:), color(_:), and textAlignment(_:). The corresponding property is set in the body of the method and, to enable method chaining, each method returns the StringBuilder instance.
// MARK: - Public API

func fontName(_ fontName: FontName) -> StringBuilder {
    self.fontName = fontName
    return self
}

func size(_ size: CGFloat) -> StringBuilder {
    self.size = size
    return self
}

func color(_ color: UIColor) -> StringBuilder {
    self.color = color
    return self
}

func textAlignment(_ textAlignment: NSTextAlignment) -> StringBuilder {
    self.textAlignment = textAlignment
    return self
}
The build() method returns an NSAttributedString instance and its implementation is similar to that of the toTitle(color:textAlignment:) method we created earlier. We define a mutable paragraph style and set its alignment property. We create the dictionary of attributes for the attributed string, using the values of the fontName and color properties. We ask the FontName object for a UIFont instance by invoking the font(of:) method. The dictionary of attributes is used to create an NSAttributedString instance, which we return from the build() method.
func build() -> NSAttributedString {
    // Create Paragraph Style
    let paragraphStyle = NSMutableParagraphStyle()

    // Configure Paragraph Style
    paragraphStyle.alignment = textAlignment

    // Define Attributes
    let attributes: [NSAttributedString.Key: Any] = [
        .foregroundColor: color,
        .font: fontName.font(of: size),
        .paragraphStyle: paragraphStyle
    ]

    return NSAttributedString(string: string, attributes: attributes)
}
Let's put the cherry on the cake by using the StringBuilder class in the toTitle(color:textAlignment:) method. We remove the current implementation and create an instance of the StringBuilder class, passing in self as the argument. We set the font size to 24.0 points by invoking the size(_:) method. The value of the color parameter of the toTitle(color:textAlignment:) method is passed to the color(_:) method of the StringBuilder instance. We pass breeSerif to the fontName(_:) method and the value of the textAlignment parameter of the toTitle(color:textAlignment:) method to the textAlignment(_:) method. We invoke the build() method to create the attributed string. I'm sure you agree that the API is flexible, readable, and elegant.
func toTitle(color: UIColor = .black, textAlignment: NSTextAlignment = .center) -> NSAttributedString {
    return StringBuilder(string: self)
        .size(24.0)
        .color(color)
        .fontName(.breeSerif)
        .textAlignment(textAlignment)
        .build()
}
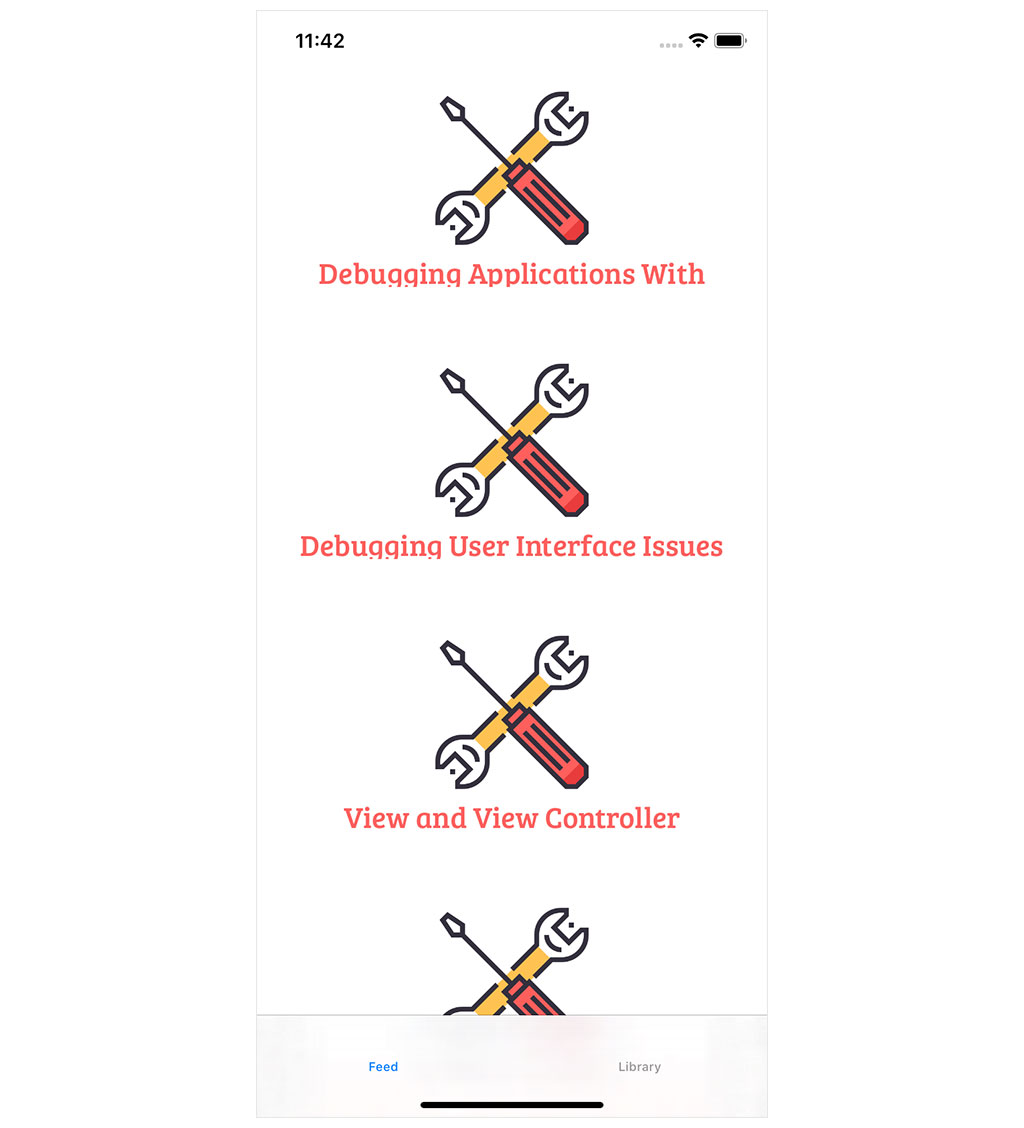
Let's use the toTitle(color:textAlignment:) method to style the EpisodeCollectionViewCell class. We only need to update the configure(with:) method of the EpisodeCollectionViewCell class. We no longer set the text property of the title label. We set the attributedText property instead. We invoke the toTitle(color:textAlignment:) method on the value of the title property of the EpisodePresentable object. We pass UIColor.Cocoacasts.red as the only argument of the toTitle(color:textAlignment:) method.
func configure(with presentable: EpisodePresentable) {
    // Configure Title Label
    titleLabel.attributedText = presentable.title.toTitle(color: UIColor.Cocoacasts.red)

    // Configure Image View
    imageView.kf.setImage(with: presentable.thumbnailUrl)
}
If we build and run the application in the simulator, the title of each episode collection view cell should be styled.
Before we end this episode, I would like to do some cleanup. With the addition of the StringBuilder class, we no longer need the extension for the UIFont class. This means we can remove UIFont+Design.swift. Open Typography.swift and set the raw value of the FontName enum to String. The raw value of each case of the FontName enum should be the name of the corresponding font.
final class StringBuilder {

    // MARK: - Types

    enum FontName: String {

        // MARK: - Cases

        case breeSerif = "BreeSerif-Regular"
        case latoBold = "Lato-Bold"
        case latoLight = "Lato-Light"
        case latoRegular = "Lato-Regular"

        ...
    }

    ...
}
This means that we can simplify the implementation of the font(of:) method of the FontName enum. To instantiate a UIFont instance, we invoke the init?(name:size:) initializer, passing in the raw value and the size. We forced unwrap the result of the initialization.
final class StringBuilder {

    // MARK: - Types

    enum FontName: String {

        // MARK: - Cases

        case breeSerif = "BreeSerif-Regular"
        case latoBold = "Lato-Bold"
        case latoLight = "Lato-Light"
        case latoRegular = "Lato-Regular"

        // MARK: - Methods

        fileprivate func font(of size: CGFloat) -> UIFont {
            return UIFont(name: rawValue, size: size)!
        }

    }

    ...
}
What's Next?
A framework for styling an application shouldn't be complex or span hundreds of lines. You can start simple. The solution I showed you in this episode is one of many solutions. I encourage you to experiment and come up with a solution that you enjoy using and that fits your project's needs.