Breakpoints are indispensable for debugging problems in a software project. Debugging an application with breakpoints can appear complex at first, but it isn't difficult once you understand what's going on. While the underlying concept of debugging with breakpoints is simple, you can make it as complex as you want.
What Is a Breakpoint
Many developers use breakpoints to debug problems, but a surprising number doesn't understand what they are and how they work under the hood. Let me start by answering the question "What is a breakpoint?"
A breakpoint gives you the ability to pause or interrupt an application based on a set of predefined conditions. The debugger breaks the application when it hits a breakpoint hence the name.
Breakpoints are set in the debugger. Developers that are unfamiliar with breakpoints wrongly assume that breakpoints need to be removed or disabled in release builds. That isn't true since the breakpoints you set in the debugger are not part of the builds the compiler creates.
You can only debug an application with breakpoints if the application is attached to the debugger. A user who downloads your application from the App Store won't run into the breakpoints you set in development because the application isn't attached to the debugger. And, as I mentioned earlier, breakpoints are set in the debugger, they are not included in the builds you upload to Apple's servers.
Breakpoint Types
In the previous episode, we added a breakpoint in RootViewController.swift. The debugger automatically pauses the application when the breakpoint is hit.
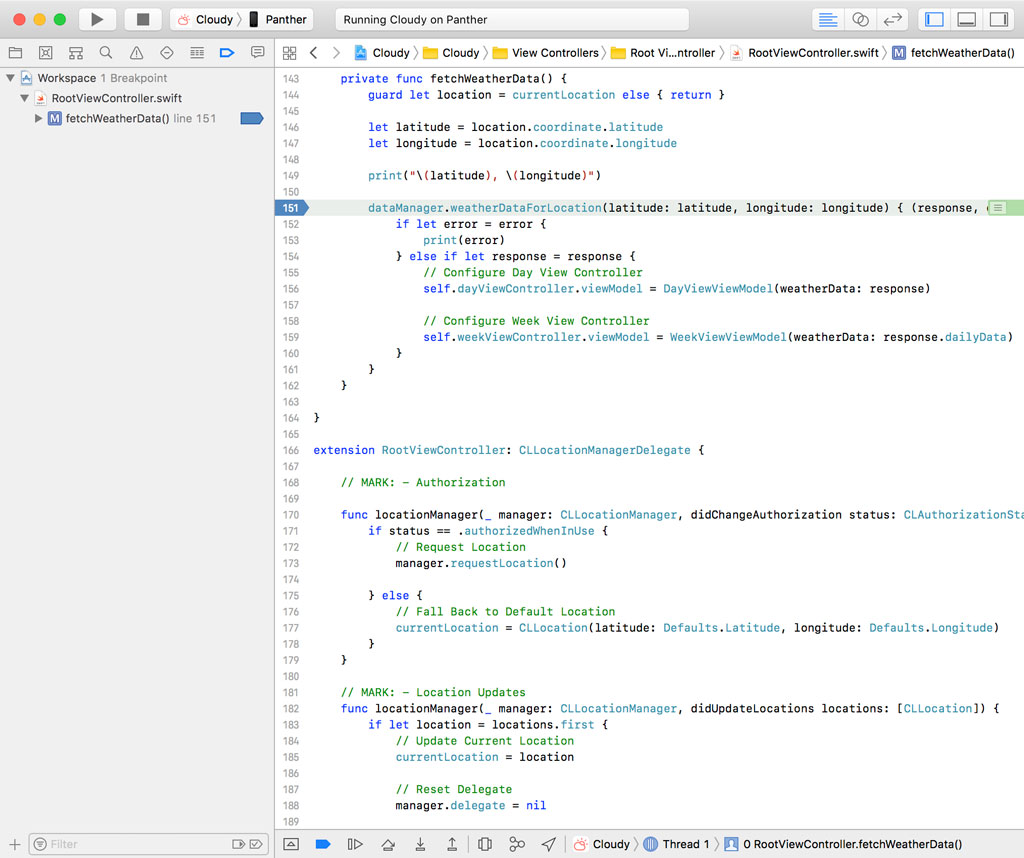
The breakpoint we added is a file and line breakpoint. Xcode supports several types of breakpoints. Open the Breakpoint Navigator on the right and click the + button at the bottom left to see what other breakpoints we can use for debugging.
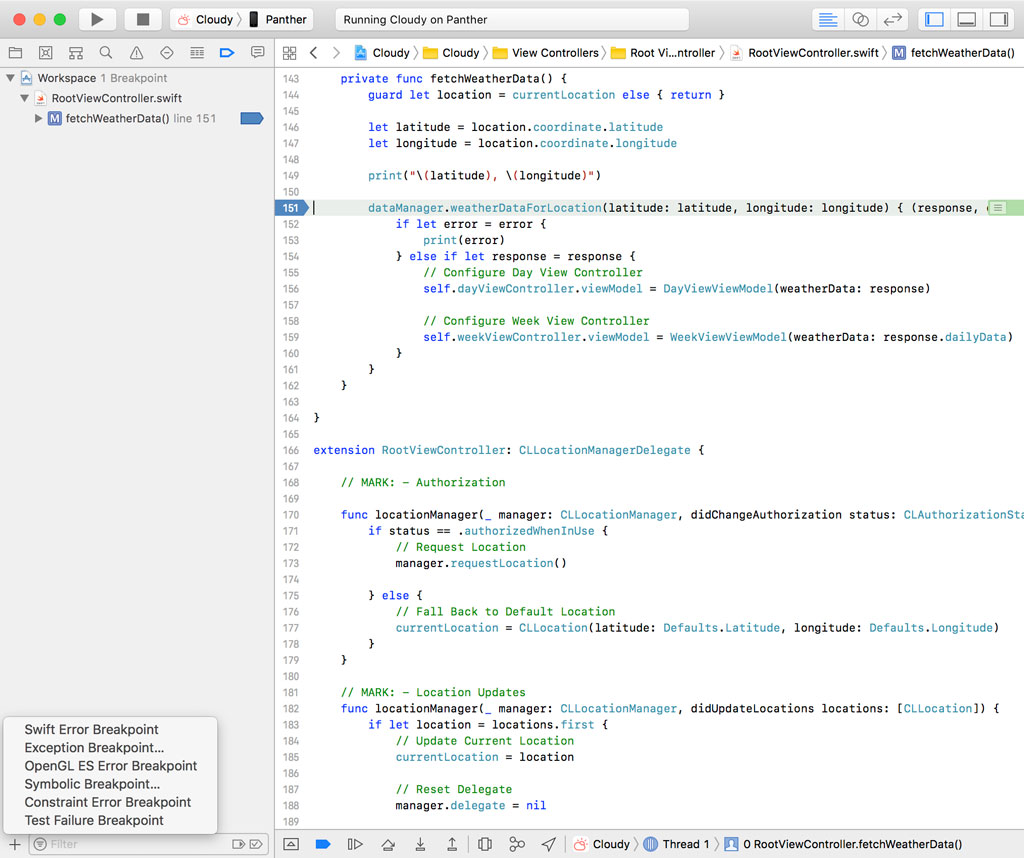
Swift Error Breakpoint
The Swift Error Breakpoint pauses execution when a Swift error is thrown. Error handling in Swift is in some ways similar to exception handling in Objective-C.
Exception Breakpoint
And that brings us to the Exception Breakpoint. This type of breakpoint is useful if you work with Objective-C and want to break the application when an exception is thrown. An exception breakpoint can be useful even if your application is entirely written in Swift. Remember that the Cocoa frameworks that power iOS, tvOS, macOS, and watchOS applications are written in Objective-C.
Symbolic Breakpoint
A Symbolic Breakpoint allows you to pause the application when a particular symbol is hit. This type of breakpoint can be useful for debugging problems that involve code you don't have direct access to.
Symbolic breakpoints are helpful, for example, if you need to debug an issue that involves one of Apple's frameworks. Because you don't have access to the source code of Apple's frameworks, it isn't possible to add a file and line breakpoint.
A symbolic breakpoint pauses the application when a particular method or function is invoked. Unlike file and line breakpoints, symbolic breakpoints can also be used if you don't have access to the source code for the method or function you're breaking on.
OpenGL ES Error Breakpoint
We won't cover the OpenGL ES Error Breakpoint in this series. It's a special type of symbolic breakpoint that's particularly useful, as the name implies, if you're working on a project that uses OpenGL ES.
Constraint Error Breakpoint
As the name implies, a constraint error breakpoint is useful for debugging issues related to Auto Layout. This type of breakpoint pauses the application if Auto Layout throws an error.
Test Failure Breakpoint
Test failure breakpoints are useful if you want to be notified if a test fails. While this may not sound interesting, later in this series I show you a trick that takes advantage of this type of breakpoint.
I'd like to start with the most common type of breakpoint, the file and line breakpoint.
File and Line Breakpoints
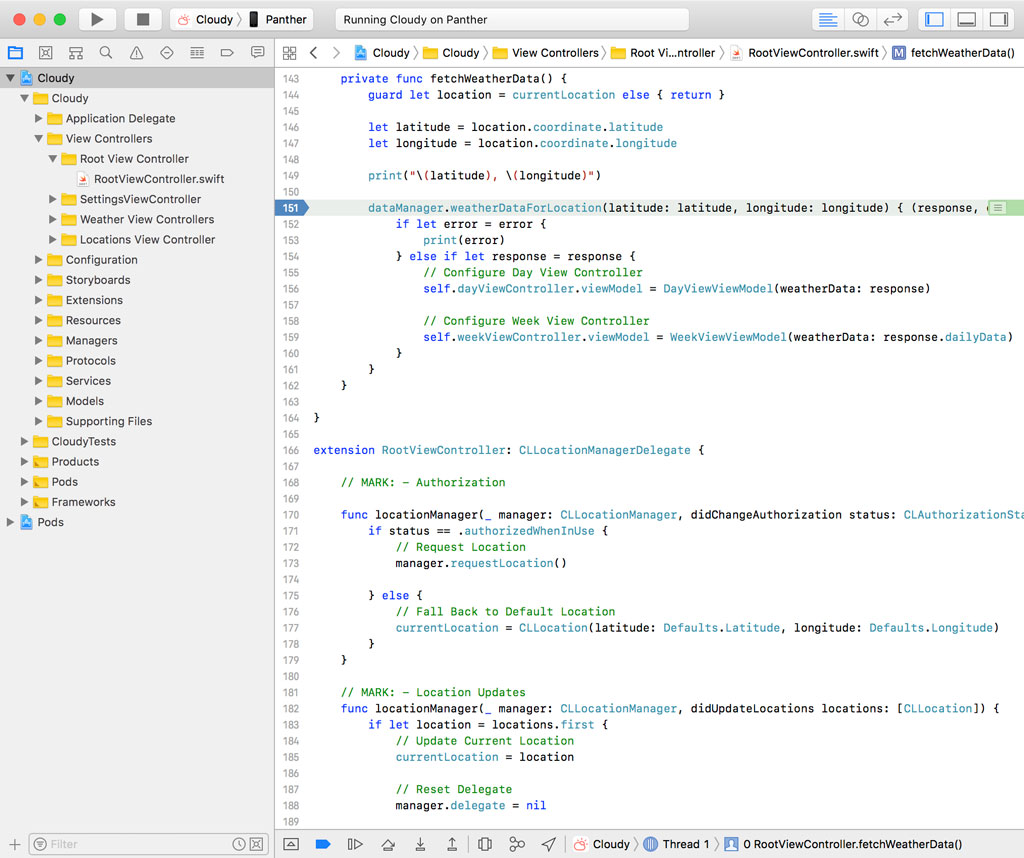
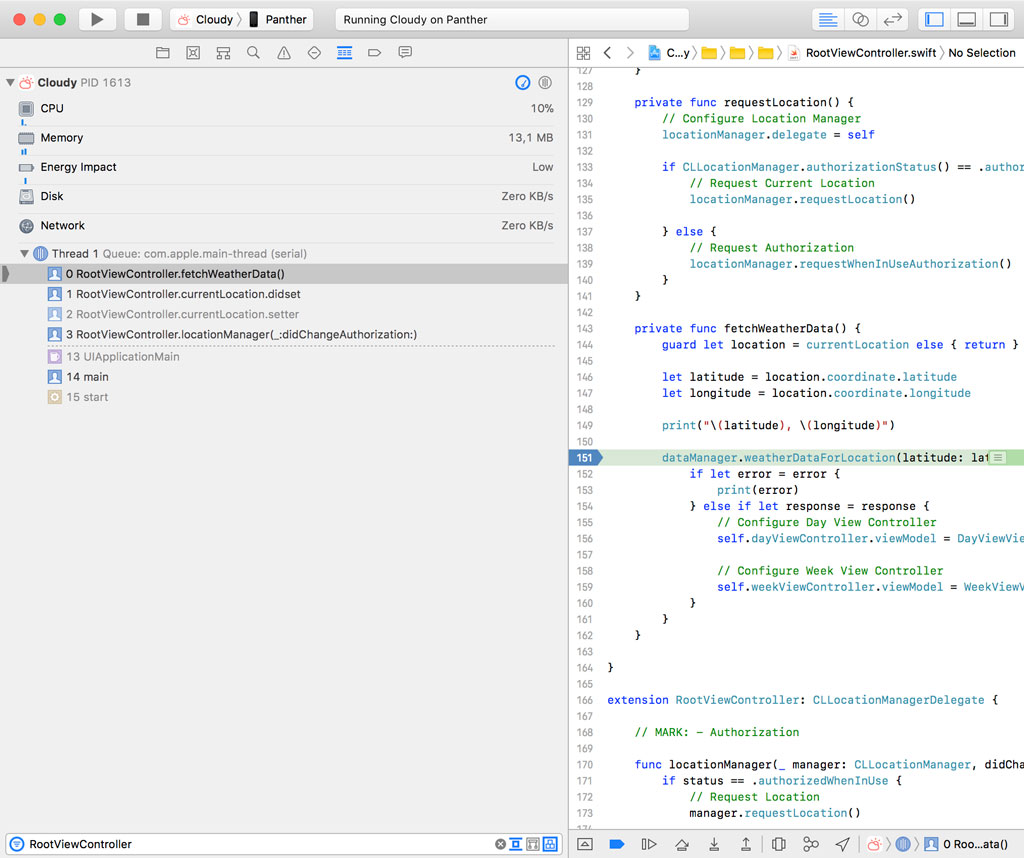
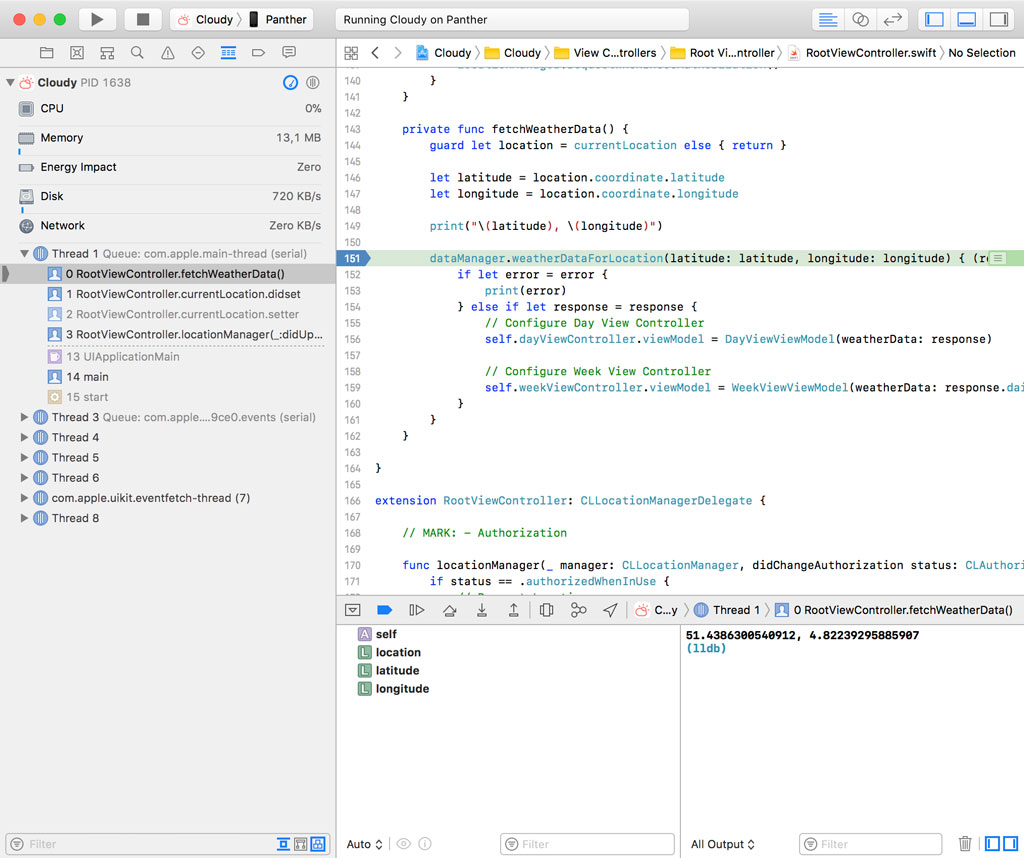
As the name implies, a file and line breakpoint is associated with a specific location in the codebase. The breakpoint we added in the previous episode is tied to line 151 of RootViewController.swift. Let's run the application and see what happens.
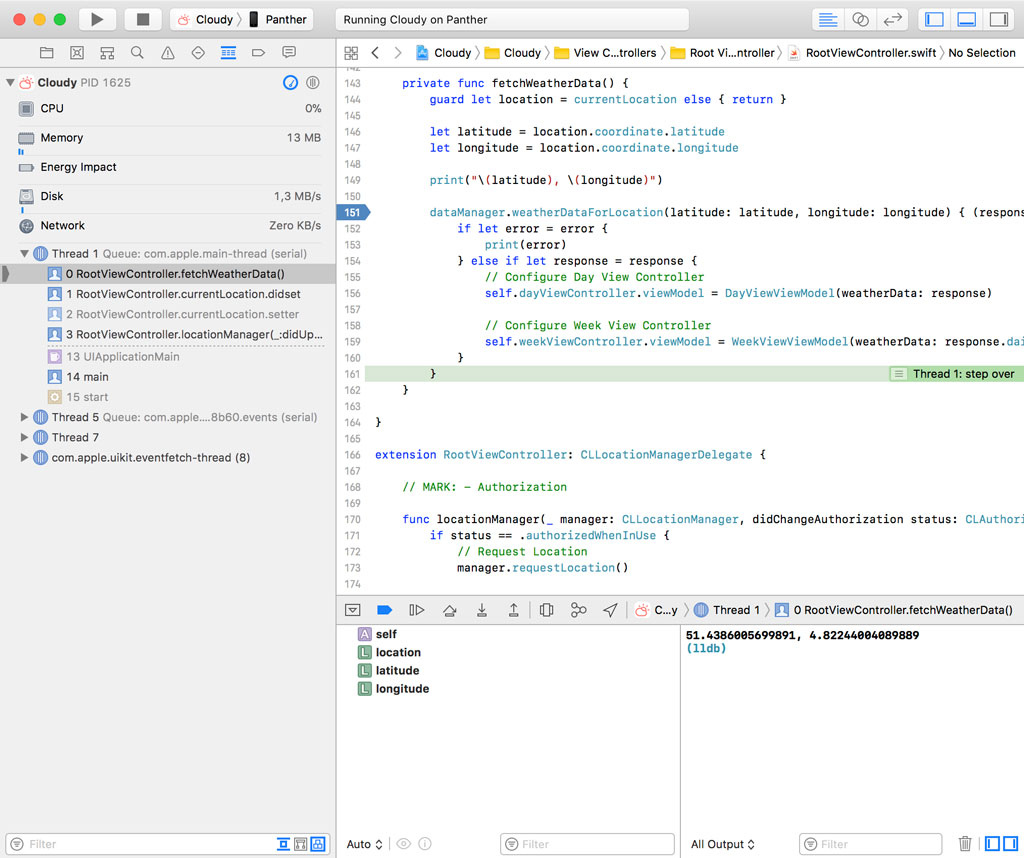
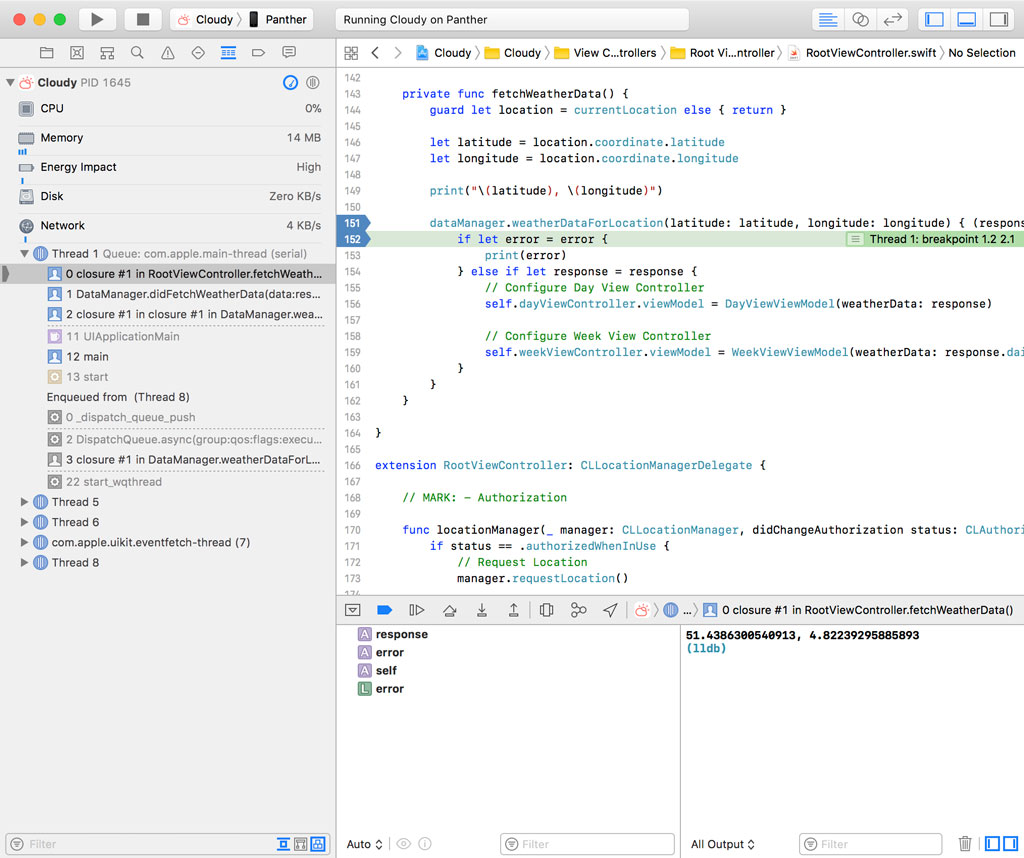
When the debugger hits the file and line breakpoint we defined in RootViewController.swift, it pauses or suspends the application. What you see and hear depends on the configuration of your Xcode installation. We revisit this topic in a later episode.
What's most interesting is the contents of the Debug Navigator on the left. Xcode shows us the backtrace of the stack frames. A backtrace or stack trace is a listing of the function calls the moment the application was paused or suspended.
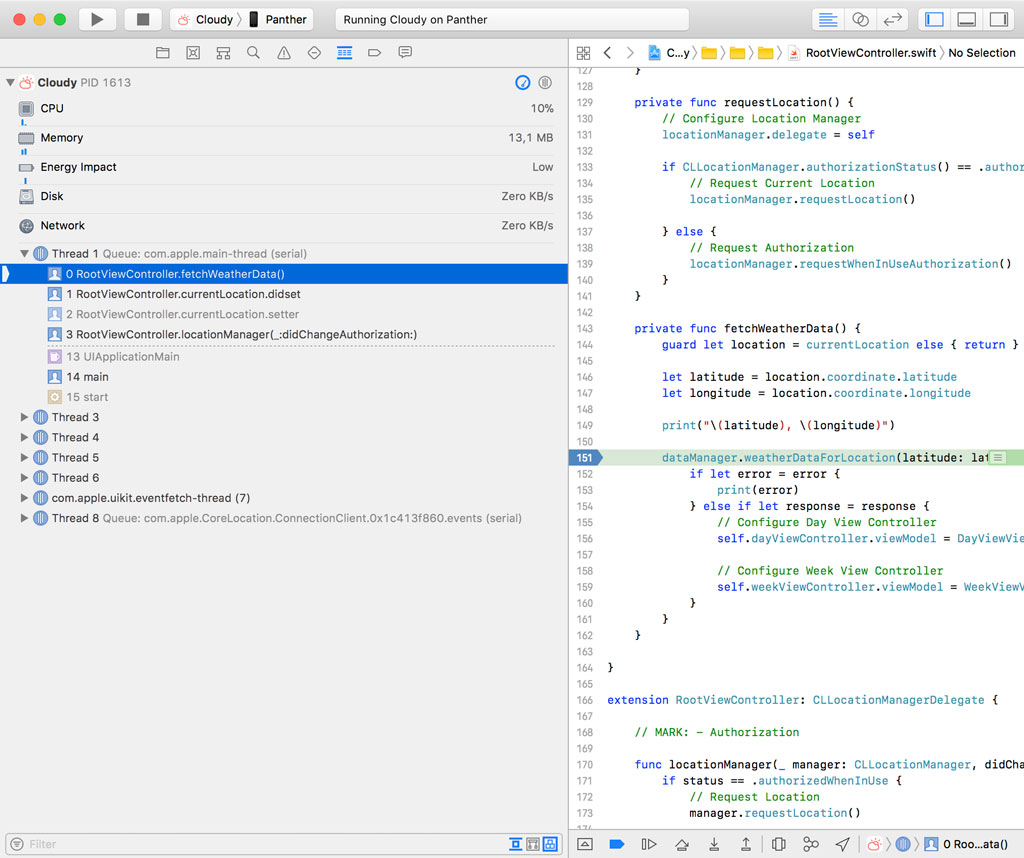
The topmost stack frame corresponds with the position of the file and line breakpoint we set in RootViewController.swift. It points to the fetchWeatherData() method of the RootViewController class. The next stack frame is the setter of the currentLocation property of the RootViewController class that triggered the fetchWeatherData() method and so on.
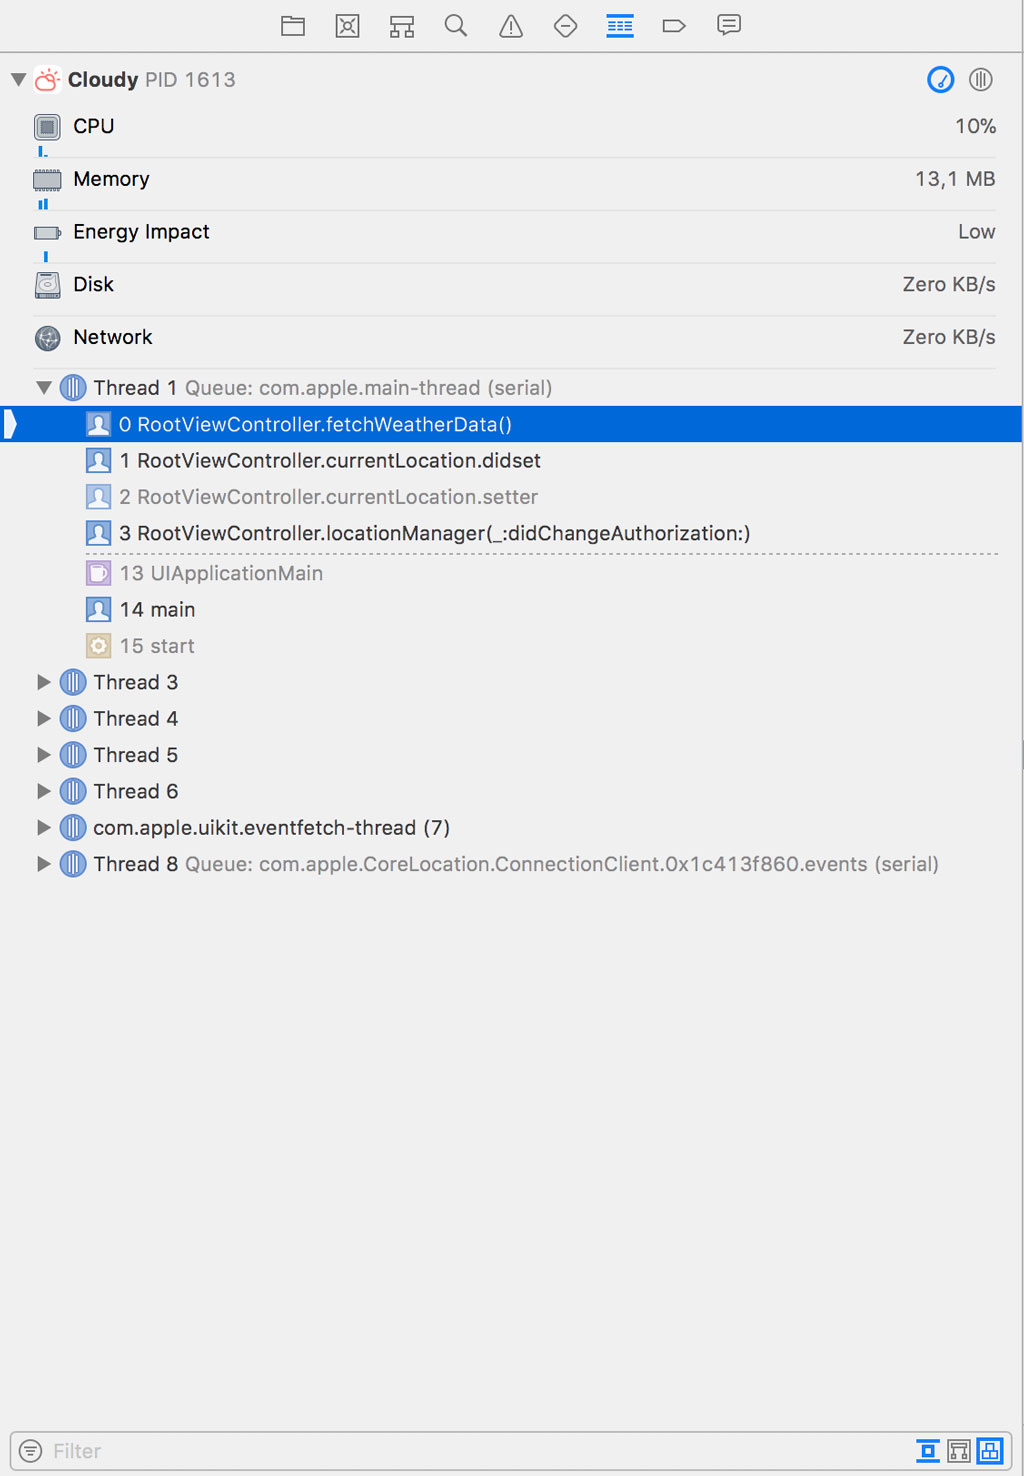
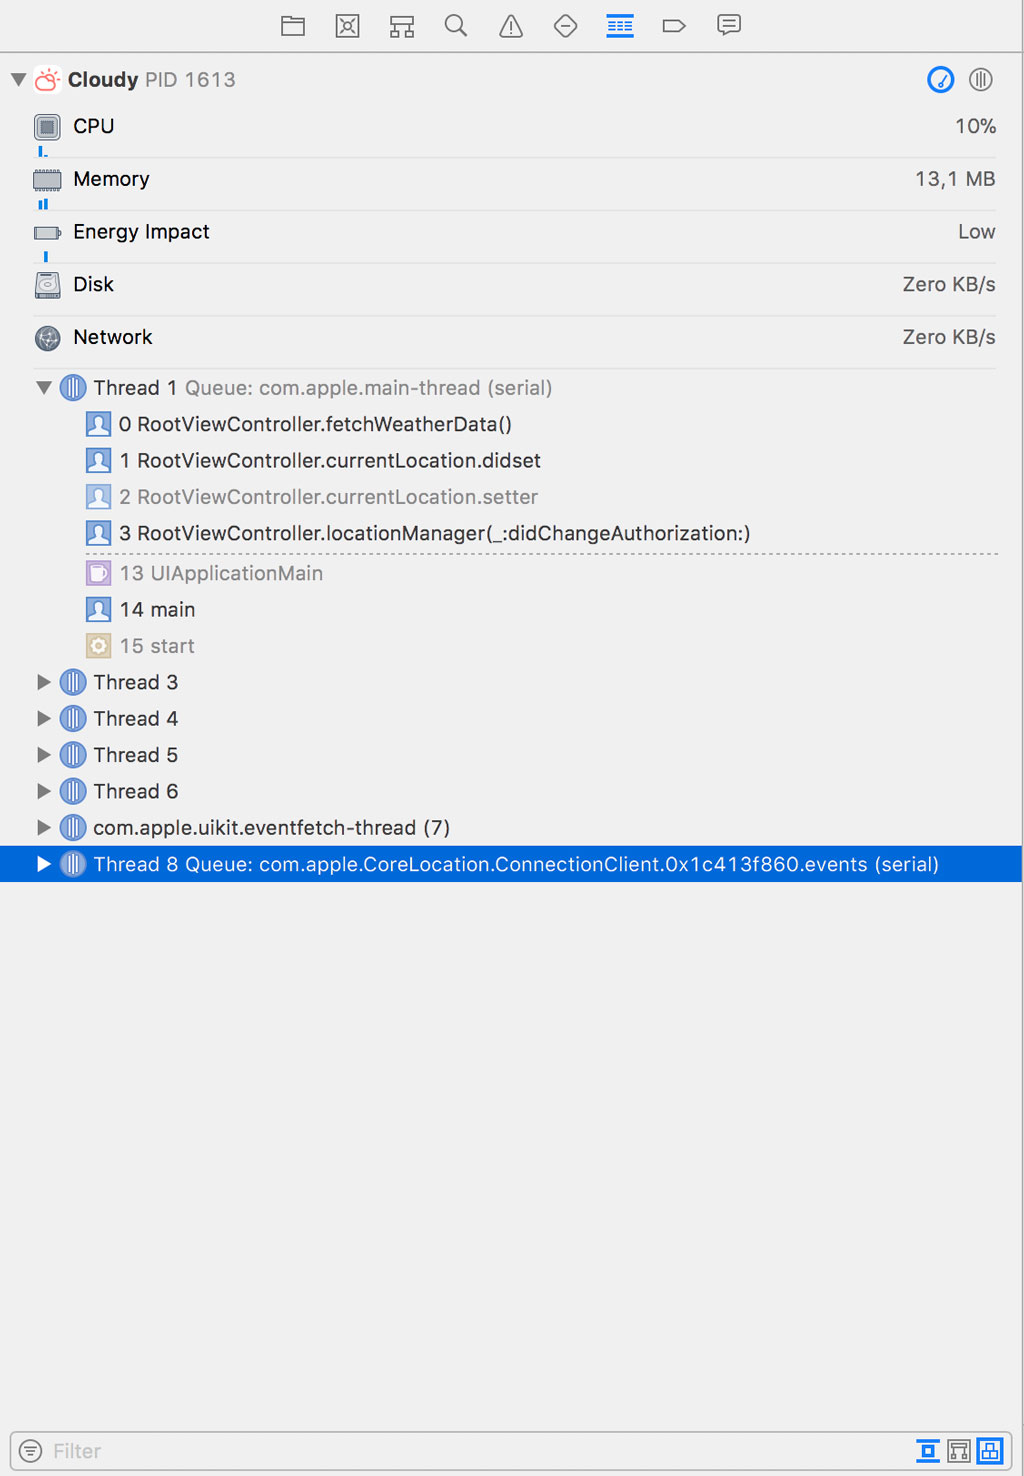
The Debug Navigator shows us that the fetchWeatherData() method was invoked on the main thread. We can also explore the backtraces of other threads. One of the other threads references the Core Location framework, which the application uses to obtain the current location of the device.
Some backtraces can be very complex and a bit of help is welcome. You can filter the backtrace by entering a keyword in the text field at the bottom and you can toggle one of the filters on the right to ignore stack frames that are not useful to debug the issue.
Xcode automatically shows you what it thinks is most useful to you. Stack frames that don't contain debug symbols, for example, are not shown by default. But it can sometimes be useful to take a peek at the entire stack frame to see which aspects of your codebase or a framework are involved.
Stepping Through Code Execution
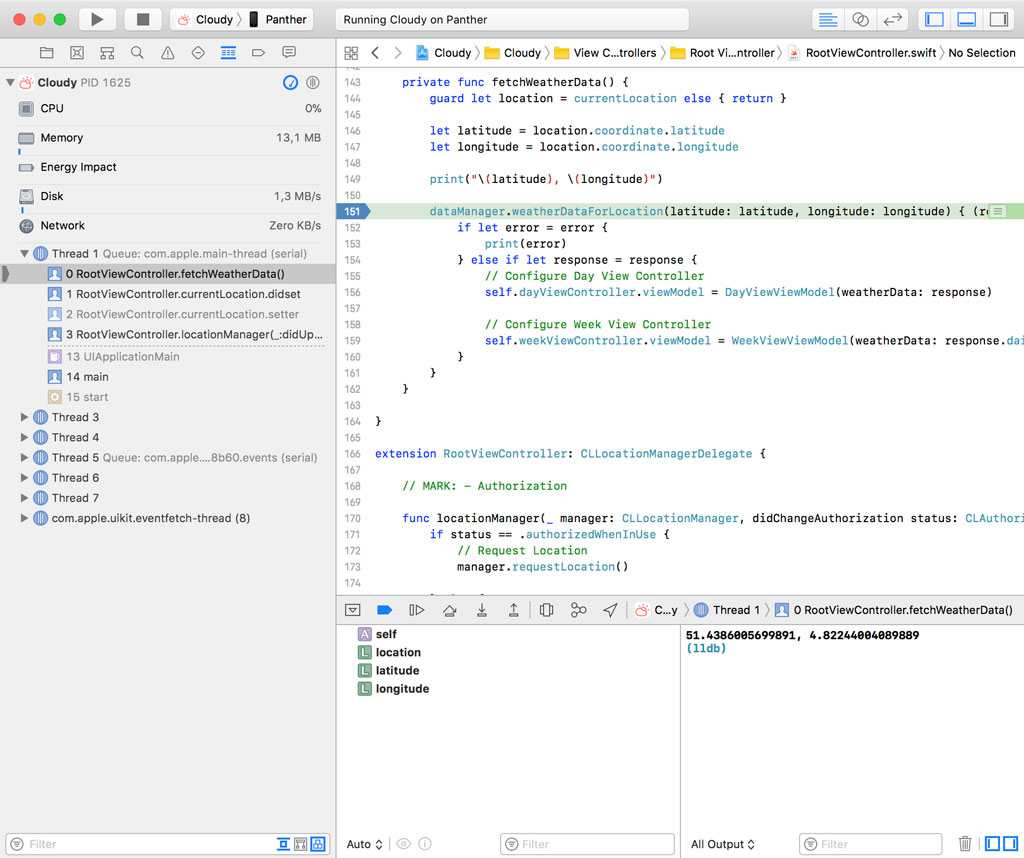
If we run the application and the breakpoint in RootViewController.swift is hit, the line of the breakpoint turns green. It indicates the location of the instruction pointer. We can inspect the stack trace, the variables view, and the output in Xcode's console. This is helpful if you're debugging an issue in your project.
But it's often useful to understand what happens next. The step controls allow us to do that. Earlier in this series, we learned that we can continue execution by clicking the Continue/Pause button. That's not what we want, though. I'd like to zoom in on the step controls on the right of the Continue/Pause button.
- Step Over
- Step Into
- Step Out

Step Over
Stepping through your code is a skill that's very useful to have. While it isn't as difficult as you might think, it's something that confuses many developers.
The application is currently paused in the fetchWeatherData() method of the RootViewController class. If we click the Step Over button, the execution of the application continues as normal and the debugger pauses execution at the next line of code. Let's try it out. Click the Step Over button and see what happens.
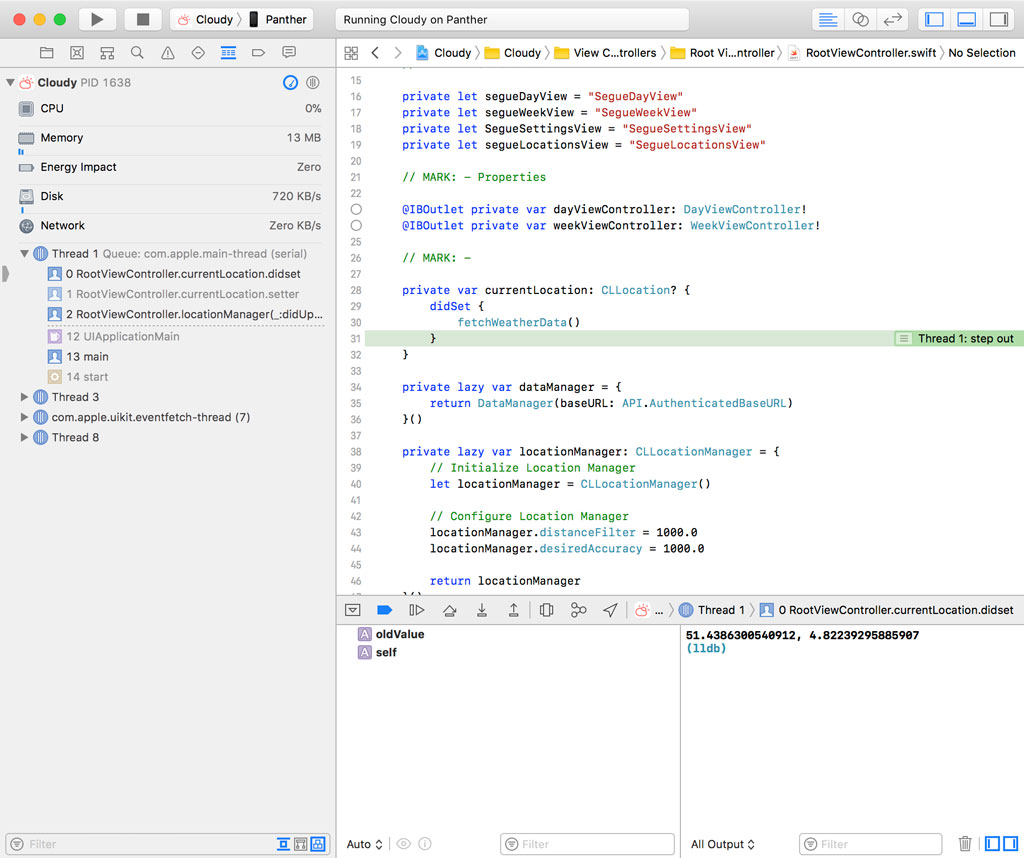
The debugger pauses the execution of the application on line 161. If we click the Step Over button again, the next line of code is executed, that is, line 162. And if we click Step Over one more time, Xcode takes us to the didSet property observer of the currentLocation property.
Even though the name Step Over may sound odd or confusing, it simply means we advance to the next line of code as if the application is running under normal conditions.
Step Into
To illustrate how the Step Into button works, we need to set a breakpoint on line 30 in RootViewController.swift. We disable the breakpoint on line 151 by clicking the breakpoint in the gutter once. The breakpoint turns gray to indicate that it's disabled.
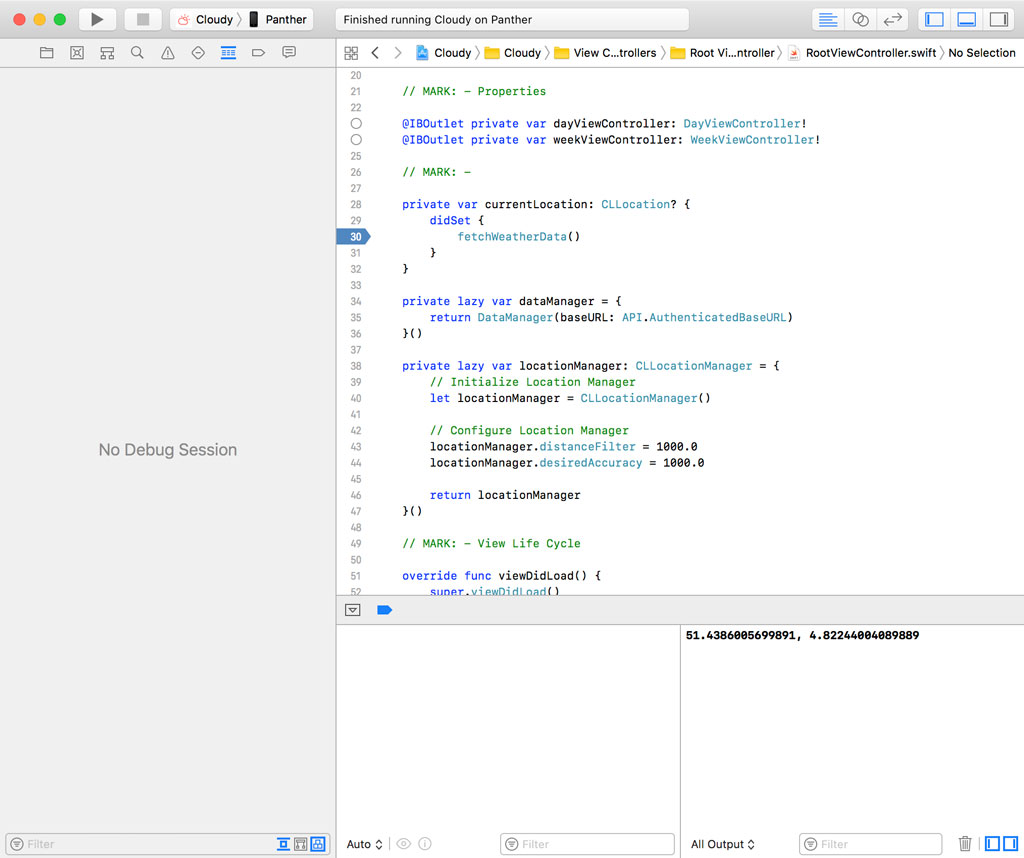
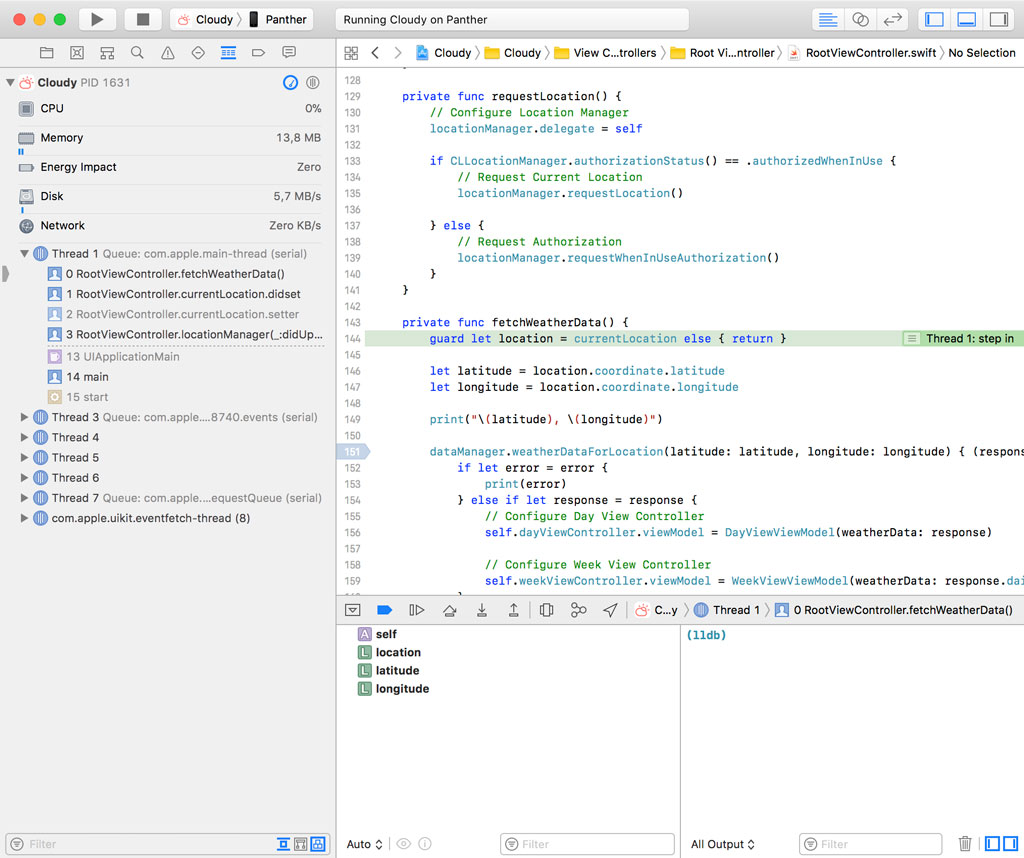
If we run the application again, the debugger pauses execution on line 30 of RootViewController.swift. We can continue to the next line by clicking the Step Over button. But that's not what we want this time. Run the application again and click the Step Into button, the button on the right of the Step Over button.
As the name implies, the Step Into button follows the execution of the application into the fetchWeatherData() method. Let's give it a try. The debugger breaks the application on line 144 of RootViewController.swift, the first line of the body of the fetchWeatherData() method.
If there's no method to step into, then the debugger advances to the next line of code and the result is identical to clicking the Step Over button.
Step Out
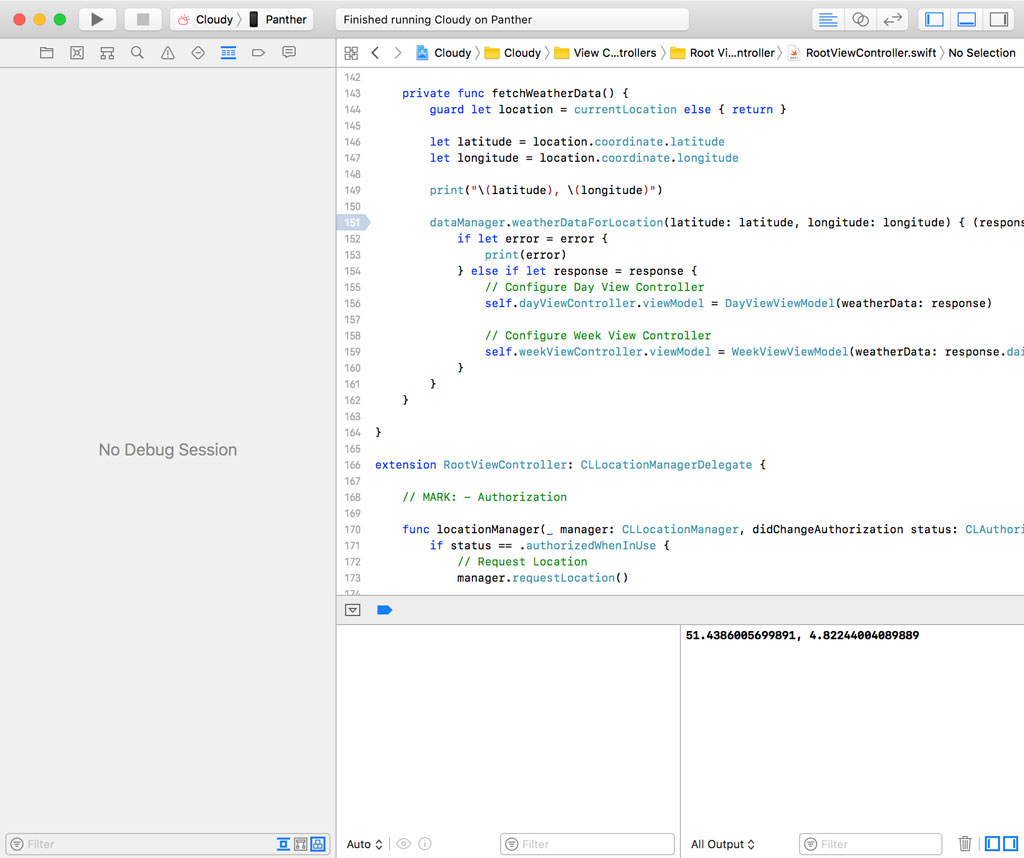
Now that you know what stepping into a method or function means, it's easy to understand what stepping out of a method or function involves. Enable the breakpoint on line 151 in RootViewController.swift and remove the breakpoint on line 30 by dragging it out of the gutter. That's a quick and convenient technique to remove a breakpoint.
Run the application again. The debugger pauses the application on line 151 in RootViewController.swift.
If we click the Step Over button, the debugger advances to the next line of code. Another option is stepping out of the current scope by clicking the Step Out button. It means we instruct the debugger to step out of the fetchWeatherData() method. Let's see what happens.
The debugger takes us to the didSet property observer of the currentLocation property.
Click the Step Out button one more time and see what happens.
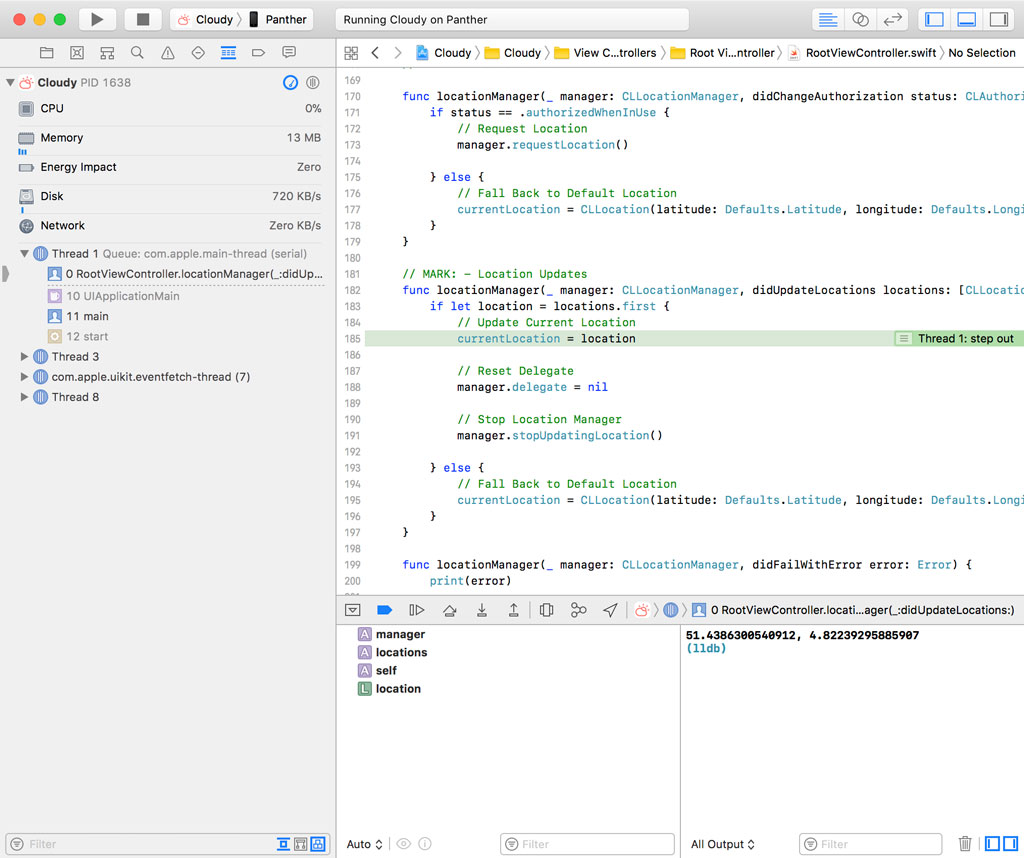
The debugger takes us to the locationManager(_:didUpdateLocations:) method of the CLLocationManagerDelegate protocol. In that method, the didLocation property is set and, as a result, the didSet property observer is triggered.
Knowing how to step through your code is very important if you're working with breakpoints. The best way to learn the difference between step over, step into, and step out is by playing with breakpoints. After a while, it becomes second nature to efficiently and effectively step through your code.
Asynchronous Code
You may have wondered why the debugger didn't enter the closure we passed to the weatherDataForLocation(latitude:longitude:completion:) method of the RootViewController class earlier in this episode. Let's run the application again and break on line 151 in RootViewController.swift.
If we step over to the next line of code, the debugger takes us to line 161. Why does the debugger skip the closure we passed to the weatherDataForLocation(latitude:longitude:completion:) method? The closure is invoked by the data manager once it received a response from the Dark Sky API. Because the network request to the Dark Sky API is performed asynchronously in the background, the closure we pass to the weatherDataForLocation(latitude:longitude:completion:) method isn't invoked immediately.
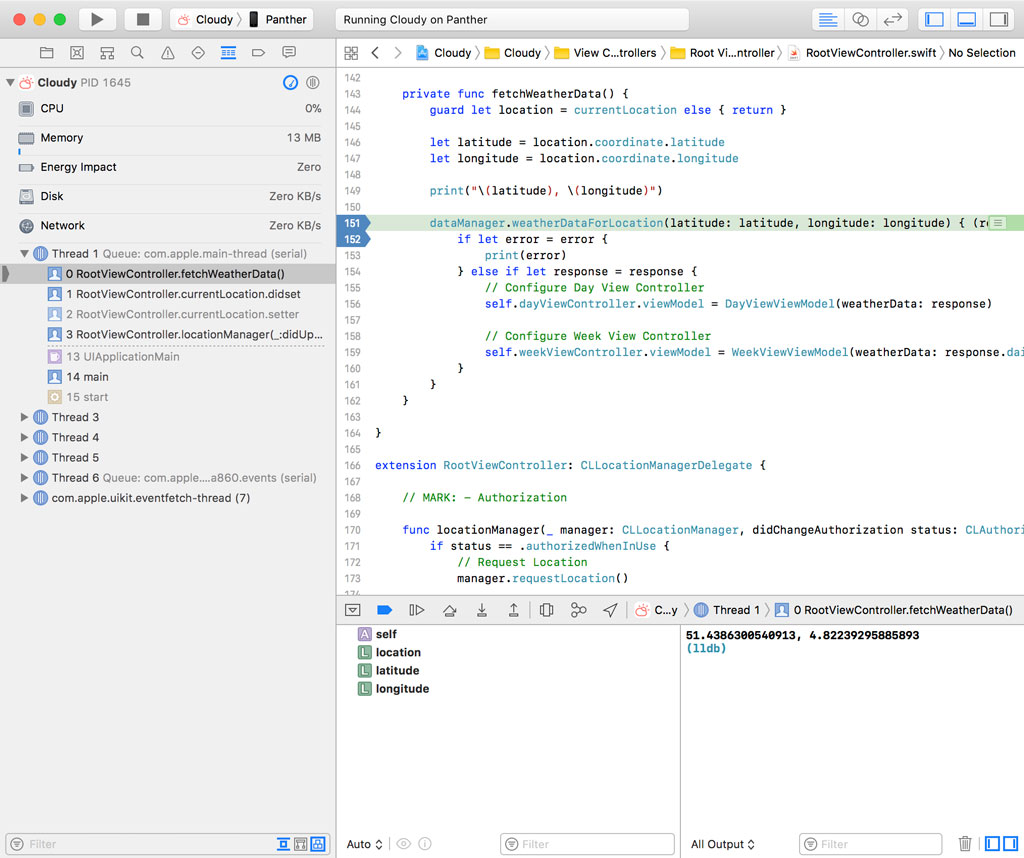
You need to understand that the debugger follows the flow of your application. This becomes clear if we add a breakpoint on line 152 in RootViewController.swift.
Run the application. The debugger breaks the execution of Cloudy on line 151. Cloudy continues if we click the Continue/Pause button. A moment later, the debugger breaks the execution of Cloudy on line 152. The stack trace shows us that the closure to which we added the breakpoint is invoked the moment the data manager receives a response from the Dark Sky API.
Debug Symbols
While I don't want to overcomplicate this episode with technical details, it's important to understand that you can only debug code for which you have the debug symbols. The code you write is translated to assembly and the debugger can only translate assembly to Swift if it has the debug symbols for that piece of code.
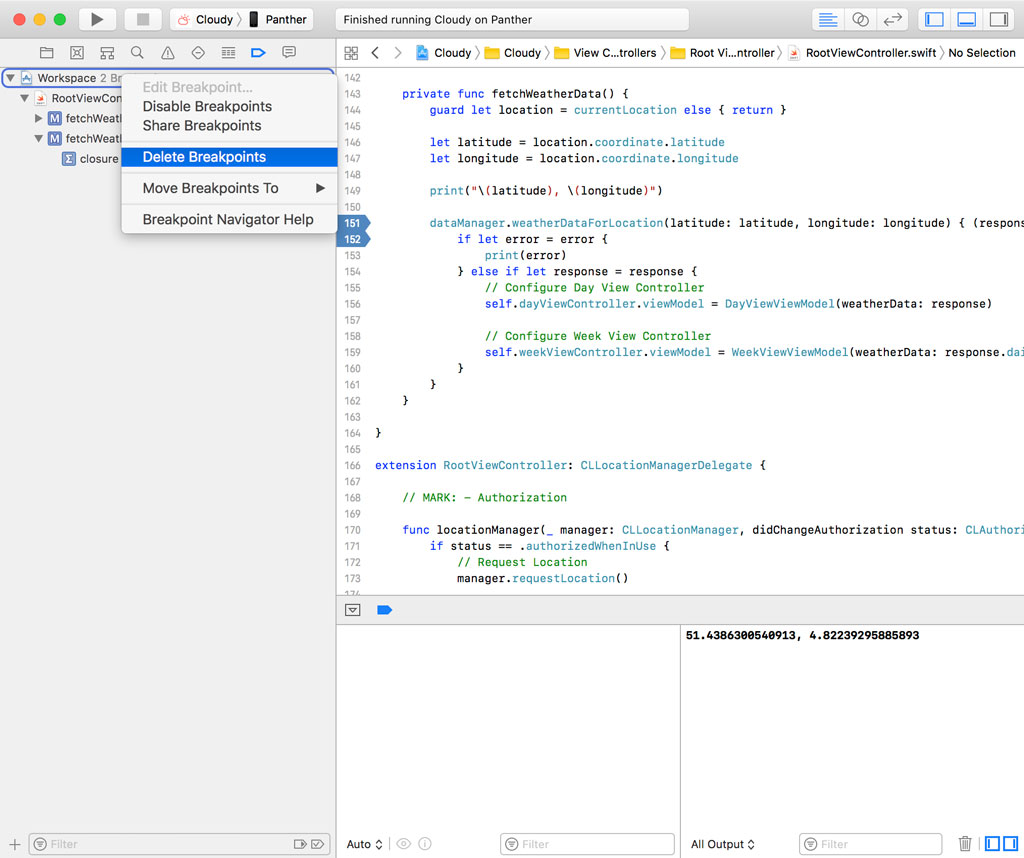
Let me illustrate this with an example. Open the Breakpoint Navigator on the left, right-click RootViewController.swift, and choose Delete Breakpoints. I want to start with a clean slate.
Open RootViewController.swift and add a breakpoint to the viewDidLoad() method on line 52. Run the application. The debugger pauses the application on line 52.

What happens if we decide to step out of the viewDidLoad() method of the RootViewController class. Click the Step Out button to find out.
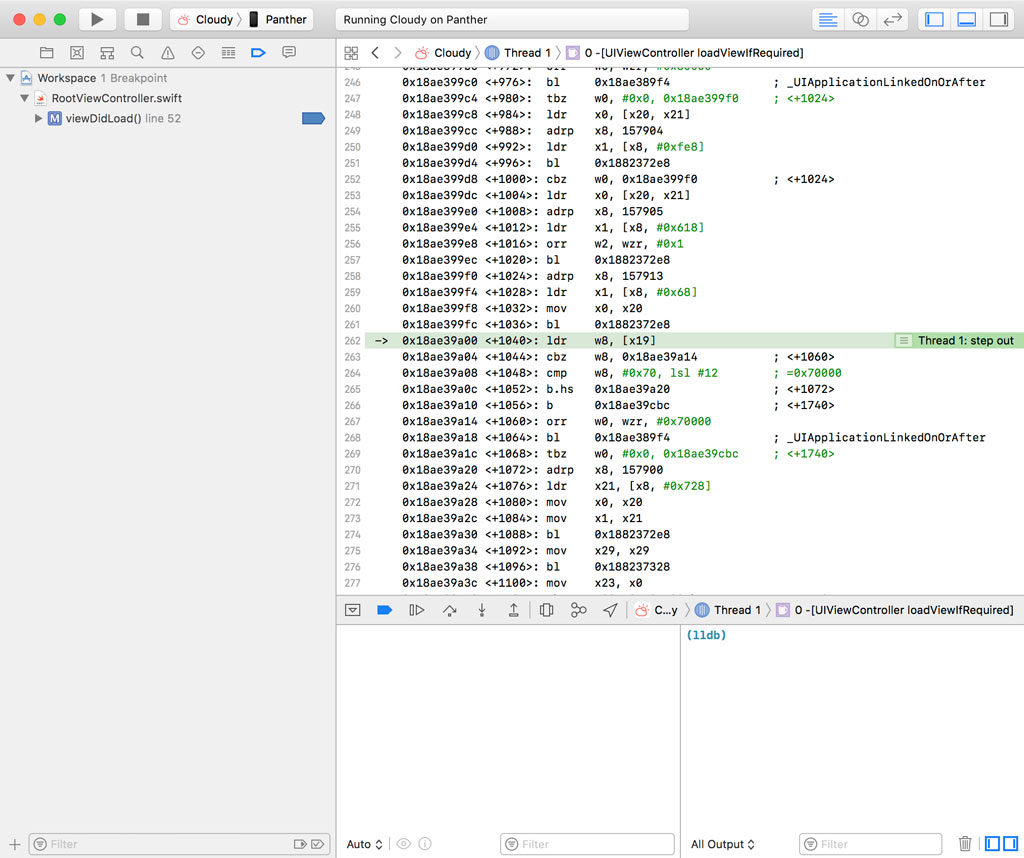
By stepping out of the viewDidLoad() method of the RootViewController class, the debugger takes us to the scope in which the viewDidLoad() method is invoked. What we're seeing isn't very useful, though. The debugger shows us assembly.
The compiler translates the code you write to the assembly language. The assembly language is interpreted by the hardware of the device your application runs on. Because most of us can't read assembly, the debugger kindly translates assembly to Swift or Objective-C. That makes debugging Cloudy a lot easier.
But the debugger can only do that if it has the debug symbols for the code it translates. Debug symbols are like a dictionary to translate assembly to Swift or Objective-C. While this is a simplified explanation of what happens under the hood, it should give you an idea why debug symbols are essential for debugging. When you build your application in development, the compiler automatically creates debug symbols for the build it creates.
This isn't true for Apple's frameworks or a third party framework you're using in a project. If the debugger doesn't have the debug symbols for a piece of code you're trying to debug, then it has no other option but to show you what you're seeing here, assembly. You can see some hints in the assembly code, but it's usually not very useful for debugging your application.
That's also why you always need to safely store the debug symbols of any application you ship to the App Store. Without debug symbols, you cannot symbolicate the crash reports you collect.